Stylish and Affordable Wooden Serving Trays to Make and Sell

Stylish and Affordable Wooden Serving Trays to Make and Sell

Stylish and Affordable Wooden Serving Trays to Make and Sell

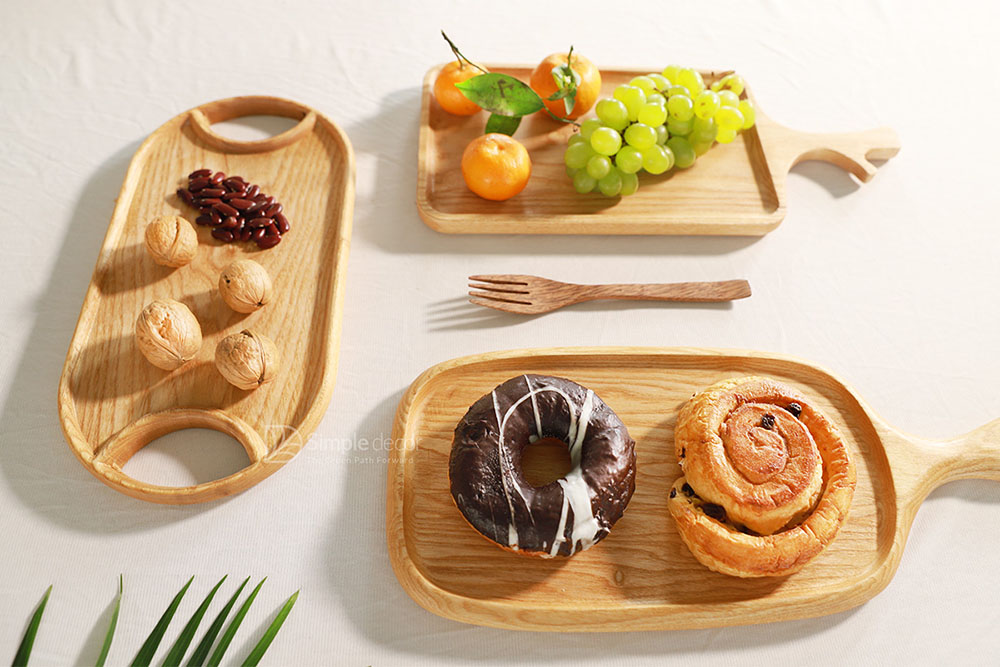
Wooden serving trays are a timeless and versatile addition to any home, offering both practicality and aesthetic appeal. Their natural warmth and durability make them a popular choice for entertaining, serving meals, and organizing belongings. If you're looking to tap into the growing market for handcrafted home goods, creating and selling stylish and affordable wooden serving trays can be a rewarding endeavor. This article will delve into the process of crafting these sought-after items, providing insights and tips to help you succeed.

Choosing the Right Wood

The first step in creating a wooden serving tray is selecting the right type of wood. The choice depends on your desired aesthetic, budget, and the intended use of the tray. Here are some popular options:

Hardwoods

  • Maple: Known for its durability, light color, and subtle grain pattern, maple is a good choice for everyday use.
  • Cherry: Offering a rich, reddish-brown color that deepens with age, cherry wood is prized for its elegant appearance and smooth texture.
  • Walnut: This hardwood boasts a distinctive dark brown color and intricate grain patterns, creating a luxurious look.
  • Oak: Oak is a strong and durable wood with a characteristic grain pattern, making it suitable for both rustic and modern designs.

Softwoods

  • Pine: Pine is a readily available and affordable softwood with a light, yellowish color and a prominent grain pattern. It's often used for rustic and farmhouse-style trays.
  • Cedar: Cedar offers a warm, reddish-brown color and a distinctive aroma. It's known for its natural insect-repellent properties, making it ideal for serving cheese or other foods.

Reclaimed Wood

Reclaimed wood provides a unique and sustainable option, adding character and history to your serving trays. You can find reclaimed wood from old barns, pallets, or salvaged furniture, offering a wide range of colors, textures, and finishes.

Designing Your Wooden Serving Trays

The design of your serving trays will play a crucial role in their appeal. Consider the following factors:

Shape and Size

Trays come in a variety of shapes, including rectangular, square, round, oval, and even unique custom shapes. The size will depend on the intended use. For serving food, a larger tray might be necessary, while a smaller tray might suit serving snacks or drinks.

Handles

Handles are essential for comfortable carrying. You can choose from a variety of styles, including simple cutouts, decorative handles, or even leather straps. Consider the overall design and the size of the tray when selecting handles.

Finish

The finish will determine the look and feel of your trays. Options include:

  • Natural oil finish: Provides a protective layer while preserving the wood's natural beauty.
  • Wax finish: Offers a subtle sheen and enhances the wood's color.
  • Stain: Adds color and depth to the wood, creating a variety of effects.
  • Paint: Allows you to create unique and vibrant designs, adding a personal touch.

Tools and Equipment

To craft your wooden serving trays, you'll need a basic set of tools and equipment. Here's a list of essentials:

  • Saw: A circular saw or table saw is ideal for cutting wood to size.
  • Router: Used for creating decorative edges and intricate details.
  • Sandpaper: Different grits of sandpaper are essential for smoothing surfaces and achieving a desired finish.
  • Clamps: Used to secure wood pieces together for assembly.
  • Drill: Required for drilling holes for handles or other attachments.
  • Safety gear: Eye protection, gloves, and dust mask are crucial for safe woodworking practices.

Crafting Your Wooden Serving Trays

Once you've gathered the materials and tools, you can start crafting your wooden serving trays. Follow these steps:

Cutting and Shaping

  • Measure and cut the wood according to your desired size and shape.
  • Use a router to create any decorative edges or details you envision.

Assembly

  • If your tray requires assembly, join the wood pieces using glue, screws, or dowels. Secure the pieces with clamps until the glue dries.

Sanding

  • Sand the entire surface of the tray thoroughly, starting with coarser grits and progressing to finer grits for a smooth finish.

Finishing

  • Apply the chosen finish, following the manufacturer's instructions. Allow the finish to dry completely before handling.
  • Attach handles or other embellishments, if desired.

Marketing and Selling Your Wooden Serving Trays

Once you've created your beautiful wooden serving trays, it's time to bring them to market. Consider these options:

Online Marketplaces

  • Etsy: A popular platform for handmade and vintage goods, Etsy offers a vast audience for your products.
  • Amazon Handmade: Allows you to sell handmade items on Amazon's vast marketplace.
  • Facebook Marketplace: Connect with local buyers and sell your trays directly to your community.

Craft Fairs and Markets

  • Participating in local craft fairs and markets provides a chance to connect with customers in person and showcase your unique designs.

Social Media

  • Use Instagram, Facebook, and Pinterest to promote your trays and reach a wider audience. Share stunning photos and videos of your creations, showcasing their beauty and functionality.

Pricing Your Wooden Serving Trays

Setting the right price for your wooden serving trays is essential for profitability. Consider the following factors:

  • Cost of materials: Include the price of wood, handles, finishes, and any other supplies.
  • Time spent: Factor in the hours spent designing, crafting, and finishing each tray.
  • Market research: Analyze the prices of similar serving trays sold by other artisans or retailers.
  • Profit margin: Aim for a reasonable profit margin to cover your expenses and ensure a sustainable business.

Conclusion

Creating and selling stylish and affordable wooden serving trays offers a fulfilling and profitable opportunity for those with a passion for woodworking and a desire to create beautiful, functional items. By carefully selecting wood, designing creative trays, and effectively marketing your products, you can establish a successful business that brings joy to others and enriches your own life.

Share:

Simple Wood Sign Projects to Start Selling Today

Simple Wood Sign Projects to Start Selling Today

Simple Wood Sign Projects to Start Selling Today

In the realm of handcrafted items, wood signs have emerged as a popular and profitable venture. Their versatility, aesthetic appeal, and sentimental value make them highly sought after by consumers. If you're looking to embark on a woodworking journey that yields both creative fulfillment and financial rewards, consider these simple wood sign projects that you can start selling today.

1. Welcome Signs

Welcome signs are a timeless classic that never goes out of style. They serve as a warm greeting to guests and add a touch of personalization to any home or business.

Design Ideas:

  • Simple and Elegant: A clean, rectangular sign with the word "Welcome" in a classic font.
  • Rustic Charm: A distressed wood sign with a welcoming message like "Welcome to Our Home" or "Welcome to the Cabin."
  • Personalized Welcome: Incorporate the family name or a specific message to create a truly unique sign.

Materials:

  • Wood board (pine, cedar, or reclaimed wood)
  • Saw
  • Sandpaper
  • Wood stain or paint
  • Paintbrush
  • Stencil or lettering template
  • Hardware (optional): hooks or brackets

2. Farmhouse Style Signs

Farmhouse decor is a popular trend that continues to gain momentum. Farmhouse-style signs are characterized by their rustic aesthetic, distressed finishes, and often feature inspirational quotes or family names.

Design Ideas:

  • Kitchen Signs: Quotes like "Gather Here," "Let's Eat," or "Coffee is my Love Language."
  • Bedroom Signs: Inspirational quotes like "Dream Big," "Live Laugh Love," or personalized with a family name.
  • Bathroom Signs: Humorous quotes like "Bathroom Rules," "Wash Your Hands," or "Life is better at the Beach."

Materials:

  • Wood board (reclaimed wood, pallet wood, or barn wood)
  • Saw
  • Sandpaper
  • Wood stain or paint (white, gray, or black are common)
  • Paintbrush
  • Stencil or lettering template
  • Optional: distressing tools (sandpaper, wire brush)

3. Seasonal Signs

Seasonal signs are a great way to celebrate holidays and special events throughout the year. They can be used to decorate homes, businesses, and outdoor spaces.

Design Ideas:

  • Spring: Welcome Spring, Hello Sunshine, Flowers & Butterflies
  • Summer: Summer Fun, Beach Vibes, Watermelon
  • Fall: Pumpkin Spice, Autumn Leaves, Happy Fall y'all
  • Winter: Merry Christmas, Happy Holidays, Snowflakes

Materials:

  • Wood board (pine, cedar, or plywood)
  • Saw
  • Sandpaper
  • Wood stain or paint (seasonal colors)
  • Paintbrush
  • Stencil or lettering template
  • Optional: decorative elements (pine cones, berries, ribbons)

4. Family Name Signs

Family name signs are a sentimental and personalized way to adorn a home. They can be displayed in entryways, living rooms, or bedrooms, adding a touch of warmth and identity.

Design Ideas:

  • Classic Style: A simple wood sign with the family name in a classic font.
  • Rustic Charm: A distressed wood sign with the family name in a bold, handwritten font.
  • Personalized Touch: Incorporate a family crest, established date, or a special quote.

Materials:

  • Wood board (reclaimed wood, pallet wood, or barn wood)
  • Saw
  • Sandpaper
  • Wood stain or paint (choose a color that complements the home décor)
  • Paintbrush
  • Stencil or lettering template
  • Optional: decorative elements (metal embellishments, flowers)

5. Custom Signs

Custom signs offer a unique and personalized approach to woodworking. These signs can be tailored to specific requests, allowing you to cater to the individual preferences of your customers.

Design Ideas:

  • Business Signs: Create personalized signs for local businesses, showcasing their logo, name, and contact information.
  • Anniversary Signs: Commemorate special anniversaries with a sign featuring a date, names, and a heartfelt message.
  • Quote Signs: Transform inspiring quotes, song lyrics, or favorite sayings into stunning wood signs.

Materials:

  • Wood board (pine, cedar, or reclaimed wood)
  • Saw
  • Sandpaper
  • Wood stain or paint (choose colors that match the design request)
  • Paintbrush
  • Stencil or lettering template
  • Optional: decorative elements (metal embellishments, flowers, other custom elements)

Tips for Selling Your Wood Signs

Once you've mastered the art of crafting beautiful wood signs, it's time to put them out into the world and start selling them. Here are some tips to ensure a successful venture:

  • High-Quality Materials: Use durable wood boards and high-quality paints and stains to ensure your signs last.
  • Clear and Concise Pricing: Determine fair prices for your signs based on material costs, time invested, and market demand.
  • Attractive Photography: Capture high-quality photographs of your signs in a well-lit setting to showcase their beauty.
  • Online Presence: Create an online shop on platforms like Etsy, Shopify, or Facebook Marketplace to reach a wider audience.
  • Local Markets and Events: Participate in craft fairs, farmers markets, and community events to connect with potential customers.
  • Social Media Marketing: Utilize social media platforms like Instagram, Pinterest, and Facebook to share your work, engage with followers, and promote your brand.
  • Word-of-Mouth Marketing: Encourage satisfied customers to spread the word about your wood signs through referrals and positive reviews.

With creativity, dedication, and a focus on quality, you can turn your passion for woodworking into a thriving business. Simple wood sign projects provide a rewarding path to artistic expression, financial success, and the joy of creating beautiful and meaningful pieces for others to cherish.

Share:

Birdhouses That Are Great for Beginners and Sell Well

Birdhouses That Are Great for Beginners and Sell Well

Birdhouses That Are Great for Beginners and Sell Well

So you're thinking about building birdhouses, huh? That's awesome! It's a super fun and rewarding hobby, and you can even make some extra cash if you sell them. But before you dive in headfirst, it's smart to start with some beginner-friendly designs.

Don't worry, you don't need to be a woodworking expert to build beautiful, functional birdhouses. There are tons of simple plans out there that are perfect for newbies. I'm talking about designs that don't require any fancy cuts or complicated joinery. And, the best part is, these beginner-friendly birdhouses are also some of the most popular and sellable ones!

Let's dive into some of the best birdhouse designs that are great for beginners and sell like hotcakes!

The Classic A-Frame Birdhouse

Let's start with a classic. The A-frame birdhouse is a timeless design that's super simple to build. You're basically just putting together a triangle with a flat roof. No need to stress about complicated angles or measurements.

What Makes it Great for Beginners:

  • Simple Shape: No fancy cuts, just straight lines and rectangles. You can even make them from scrap wood.
  • Easy to Assemble: It's basically just nailing a few pieces together. You can do it with just a hammer and nails if you want.
  • Versatile Design: You can customize it with different paint colors, decorations, and even add a small perch.

What Makes it Sell Well:

  • Familiar Design: People love the classic look of an A-frame birdhouse. It's nostalgic and charming.
  • Affordable: They're generally made with simple materials, making them budget-friendly for buyers.
  • Wide Appeal: They're a popular choice for both experienced birdwatchers and casual backyard enthusiasts.

The Simple Square Birdhouse

Another super easy design is the square birdhouse. It's basically a box with a flat roof. No need for complicated angles or fancy joinery.

What Makes it Great for Beginners:

  • Straightforward Construction: Just cut out some squares and rectangles, and nail them together.
  • Perfect for Leftovers: You can easily use scrap wood for this project.
  • Customization Options: You can add a small porch, a decorative roof, or even paint it with bright colors.

What Makes it Sell Well:

  • Clean Lines and Minimalism: Some people prefer a more modern, minimalist design. The square birdhouse fits the bill perfectly.
  • Easy to Decorate: A plain square shape is perfect for adding creative details and personal touches.
  • Great for Beginners: It's a popular choice for starting out, which means there's a good market for them.

The Cozy Cylindrical Birdhouse

If you want to try something a little different, a cylindrical birdhouse can be a fun project. It's not as common as the A-frame or square designs, which makes it more unique.

What Makes it Great for Beginners:

  • Easy to Cut: You can use a simple circular saw or even a jigsaw to cut out the cylinder shape.
  • Unique Design: It's not your typical birdhouse, which makes it stand out.
  • Can Be Made from Different Materials: You can use wood, PVC pipe, or even recycled materials.

What Makes it Sell Well:

  • Trendy and Modern: The cylindrical shape adds a contemporary touch to any backyard.
  • Attracts Attention: It's different enough to grab people's attention and make them want to learn more.
  • Great for Birdwatching: The cylindrical shape provides a clear view of the inside of the birdhouse.

Tips for Selling Your Birdhouses

Now that you've chosen some awesome designs, let's talk about how to sell them. Here are some tips to help you get started:

  • Find Your Niche: Do you want to focus on rustic birdhouses? Modern designs? Birdhouses for specific bird species? Find a niche that you're passionate about and target your marketing efforts accordingly.
  • Quality Matters: Use good quality wood and make sure your construction is sturdy. You want to create birdhouses that will last and keep birds safe.
  • Pricing is Key: Research similar birdhouses in your area and price yours competitively. Consider your costs for materials, time, and effort.
  • Get Creative with Packaging: Presentation matters! Wrap your birdhouses in attractive paper or fabric and add a cute tag with your business information.
  • Promote Online and Locally: Create a website or social media presence to showcase your work. Sell at local craft fairs, farmers markets, or through online marketplaces like Etsy.

Remember, selling birdhouses is a great way to share your love for birds and nature with others. And, if you're passionate about it, you can make it into a successful side hustle. So, grab your tools, choose your design, and get ready to build some beautiful birdhouses!

Share:

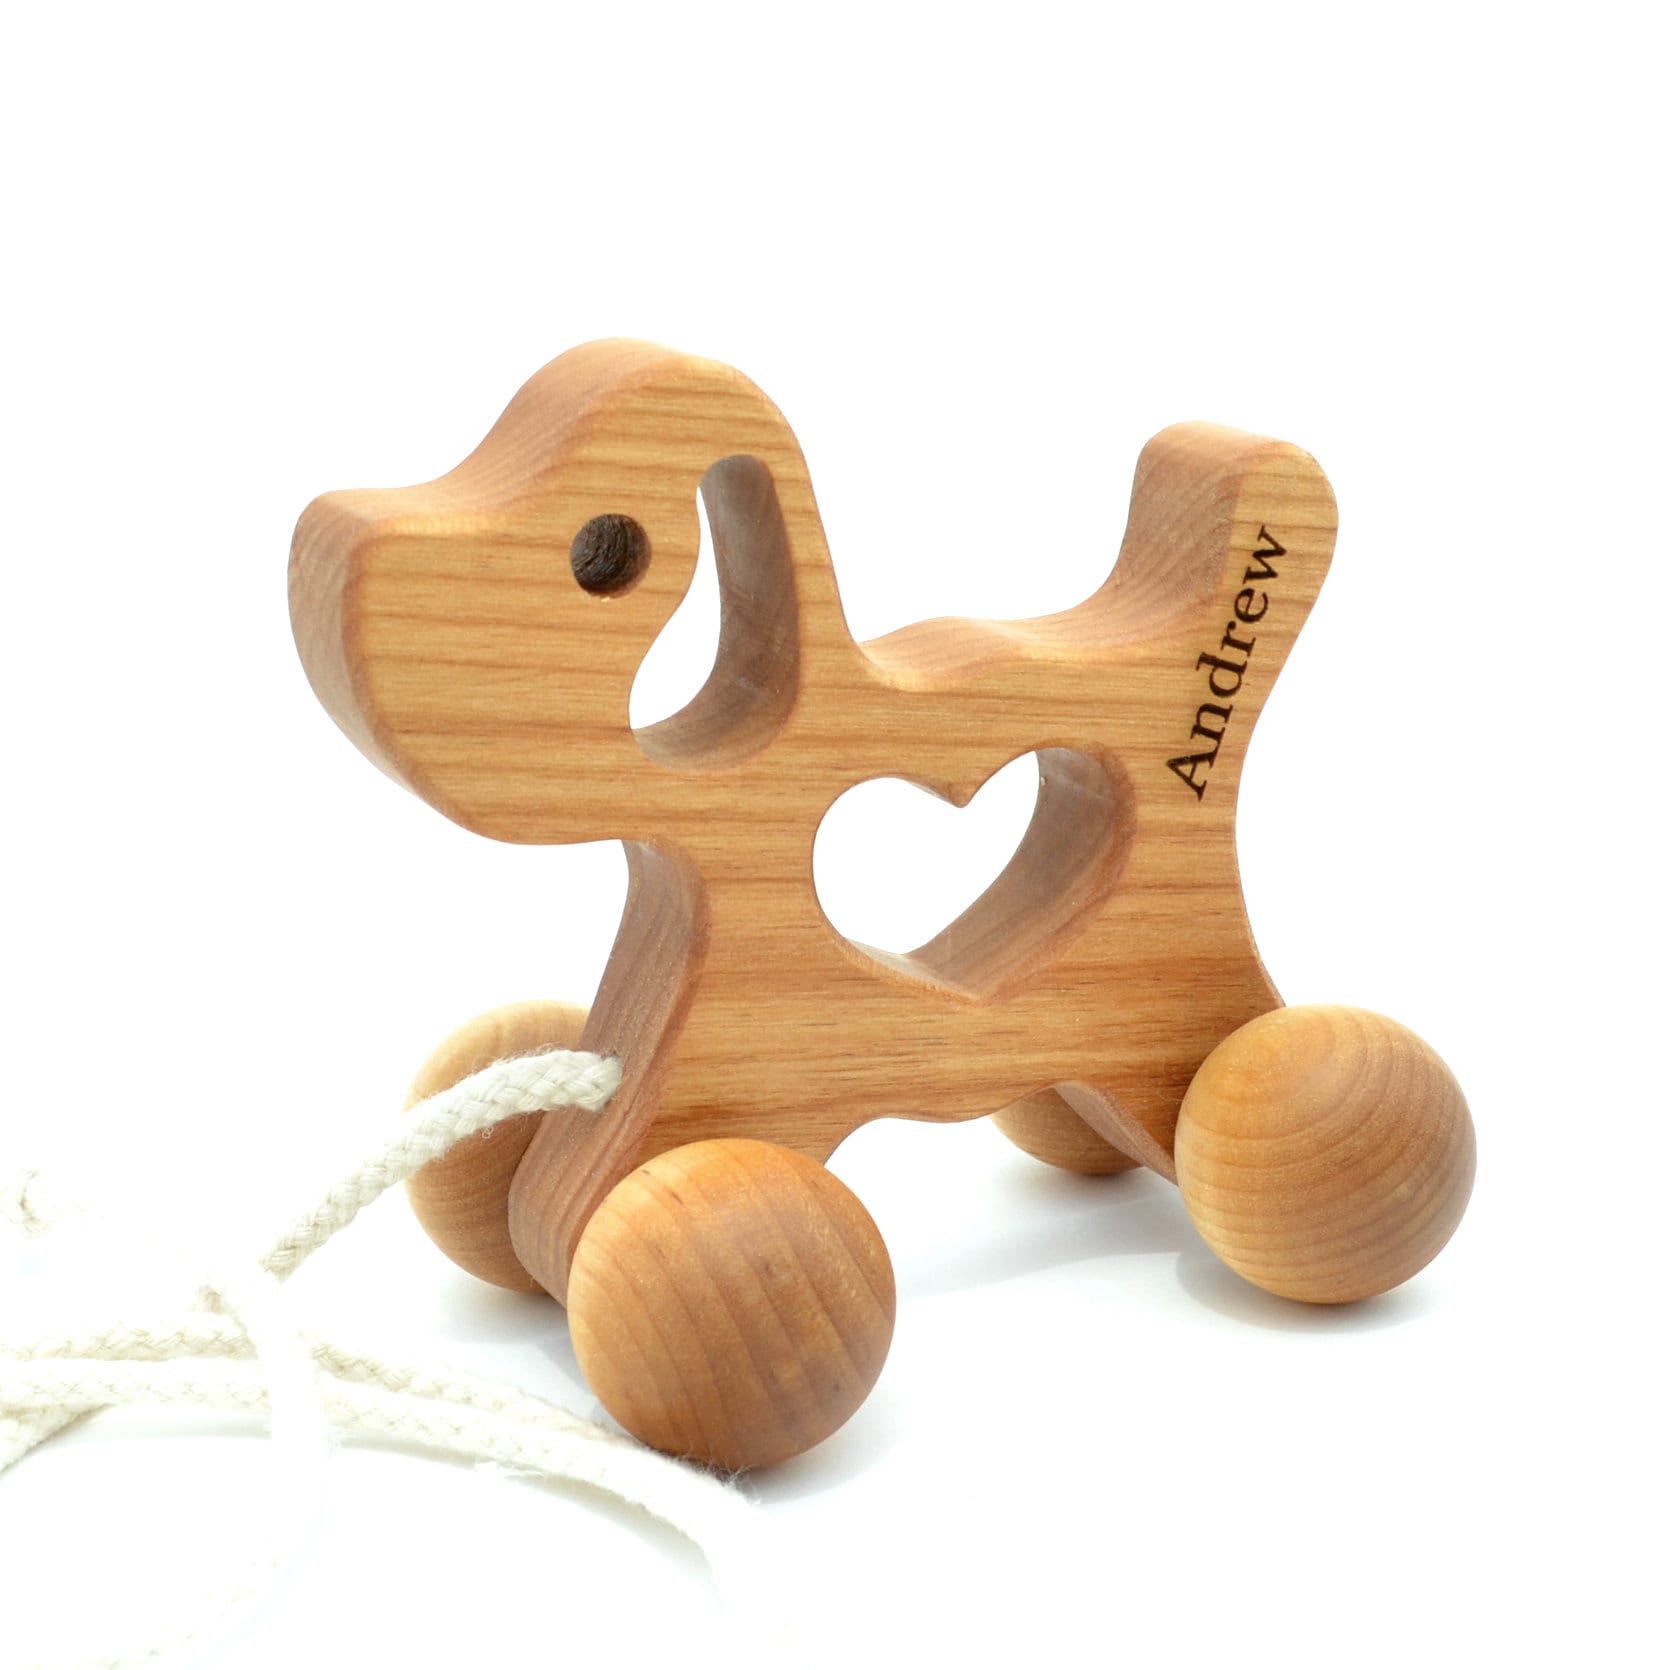
Handmade Wooden Toys with a Natural Finish That Sell Fast

Handmade Wooden Toys with a Natural Finish That Sell Fast

Handmade Wooden Toys with a Natural Finish That Sell Fast

Hey there, fellow toy enthusiasts! Are you looking for a way to tap into the growing demand for natural, eco-friendly toys? Look no further than handmade wooden toys with a natural finish. Not only are they safe and sustainable, but they also possess a timeless charm that resonates with both kids and parents. But with so many options out there, how do you create wooden toys that stand out and fly off the shelves? That's where we come in!

This guide will equip you with the knowledge and inspiration to craft stunning handmade wooden toys with a natural finish that are sure to capture hearts and drive sales. Get ready to unleash your creativity and build a thriving business with these winning strategies!

The Appeal of Natural Finish Wooden Toys

There's a reason why natural finish wooden toys are gaining popularity. They offer a unique blend of benefits that resonate with today's discerning consumers:

Safety and Sustainability

Parents are increasingly concerned about the chemicals and toxins present in many mass-produced toys. Wooden toys with a natural finish provide a safe alternative, free from harmful substances like lead paint, phthalates, and BPA. They're also biodegradable and sustainable, made from renewable resources that are better for the planet.

Aesthetics and Craftsmanship

The beauty of natural wood grain shines through in a natural finish, creating a warm and inviting aesthetic that appeals to both children and adults. The handmade quality of these toys also adds a touch of authenticity and craftsmanship that sets them apart from mass-produced alternatives.

Sensory Experience

The smooth, tactile surface of natural wood provides a sensory experience that is both calming and engaging for children. It encourages exploration, imagination, and a connection to nature.

Durability

Well-crafted wooden toys are built to last. With proper care, they can be passed down through generations, becoming cherished family heirlooms.

Crafting Wooden Toys with a Natural Finish: Tips and Techniques

Now that we've explored the allure of natural finish wooden toys, let's dive into the craft itself. Here are some tips and techniques to create beautiful and durable wooden toys:

Choose the Right Wood

The type of wood you choose will impact the durability, appearance, and even the scent of your toys. Some popular choices include:

  • Maple: Strong, hard, and with a beautiful grain pattern. Suitable for toys that require durability, like building blocks.
  • Cherry: Beautiful reddish-brown hue that darkens with age, offering a classic look. Ideal for toys that are visually appealing.
  • Walnut: Rich brown color with striking grain patterns. A sturdy and attractive choice for toys with intricate designs.
  • Pine: Softer wood that's easy to work with, making it ideal for beginners. It's also lightweight, perfect for toys that are easily manipulated by young children.

Consider the intended use of the toy when selecting the right wood. For example, a rocking horse might require a harder wood like maple, while a simple wooden puzzle could be made from softer pine.

Ensure Safe and Smooth Surfaces

Safety comes first! Before you start painting or finishing, make sure all edges and corners are sanded smooth to prevent splinters or sharp edges. Use progressively finer grit sandpaper to achieve a smooth, polished finish.

Natural Finishes: Oils, Waxes, and More

There are various natural finishes that can enhance the beauty and durability of your wooden toys. Here are a few popular options:

  • Mineral oil: A food-grade oil that provides a protective barrier without altering the color of the wood. It's easy to apply and suitable for all ages.
  • Beeswax: A natural wax that adds a protective layer and a gentle shine. It's also water-resistant, making it ideal for toys that are frequently handled or exposed to the elements.
  • Tung oil: A durable finish that penetrates deeply into the wood, enhancing its natural beauty and providing a water-resistant coating. It's best for toys that require a strong, long-lasting finish.
  • Shellac: A natural resin that creates a clear, protective coating. It's suitable for toys that need a more robust finish but can sometimes have a slight yellow tint.

Research each finish and choose the one that best suits the type of wood and the intended use of the toy.

Let It Breathe

After applying a natural finish, allow it to dry completely according to the manufacturer's instructions. This ensures that the finish penetrates the wood properly and creates a durable, protective layer.

Marketing Your Handmade Wooden Toys

Creating beautiful wooden toys is just the first step. To ensure they sell fast, you need to market them effectively. Here are some strategies to attract customers and boost sales:

Highlight the Unique Selling Points

Emphasize the safety, sustainability, and craftsmanship of your wooden toys in your marketing materials. Use high-quality photos and videos to showcase the natural beauty of the wood and the detail of your work.

Target the Right Audience

Identify your target audience. Are you aiming for parents, grandparents, or educational institutions? Tailor your marketing messages and channels to reach the right customers. Consider using social media platforms like Instagram and Facebook, where you can showcase your products and engage with potential buyers.

Online Marketplaces and Etsy

Online marketplaces like Etsy provide a platform to reach a global audience of shoppers who are actively seeking unique handmade goods. Create a professional shop profile and showcase your products with high-quality photos and detailed descriptions. Use relevant keywords to help potential buyers find your toys.

Local Craft Fairs and Markets

Connecting with customers face-to-face at local craft fairs and markets can be incredibly effective. You can showcase your toys, interact with potential buyers, and build relationships. Don't forget to have business cards and flyers available for those who want to learn more.

Word-of-Mouth Marketing

Encourage happy customers to spread the word about your toys. Offer discounts for referrals or create loyalty programs to reward repeat business. Positive customer reviews can go a long way in building trust and credibility.

Additional Tips for Success

Here are some additional tips to help you create handmade wooden toys that sell fast and build a thriving business:

  • Focus on Quality: Invest in high-quality tools and materials. This will not only lead to more durable and beautiful toys but also allow you to charge a premium price.
  • Offer Variety: Don't limit yourself to one type of toy. Explore different designs, shapes, and sizes to appeal to a wider audience. This will also give you more options when it comes to pricing and promoting your toys.
  • Embrace Innovation: Stay current with trends and introduce new designs to keep your customers engaged. Consider incorporating elements of popular children's books, movies, or games into your toys.
  • Provide Excellent Customer Service: Respond to inquiries promptly and address any issues with professionalism and care. This will build lasting relationships with customers and encourage repeat business.
  • Promote Sustainability: Highlight the eco-friendly aspects of your wooden toys. Use packaging materials that are recyclable or biodegradable, and consider offering gift wrapping options made from sustainable materials.

The demand for handmade wooden toys with a natural finish is growing rapidly. By following these tips and techniques, you can craft beautiful and durable toys that capture hearts and drive sales. Embrace your creativity, prioritize safety and sustainability, and connect with customers who appreciate the unique beauty of handcrafted goods. Get ready to build a successful business that brings joy to children and families around the world!

Share:

Easy Bath Trays with Book and Tablet Holders

Easy Bath Trays with Book and Tablet Holders

Easy Bath Trays with Book and Tablet Holders: A Guide to Relaxation and Entertainment

Indulge in a luxurious bath experience with the perfect combination of relaxation and entertainment. Bath trays, equipped with book and tablet holders, have become a must-have for those seeking to transform their bathing ritual into a haven of tranquility and enjoyment. This comprehensive guide will explore the best bath trays with book and tablet holders, providing insights into their features, benefits, and essential considerations for your ideal purchase.

The Allure of Bath Trays with Book and Tablet Holders

Bath trays are not merely functional accessories; they are designed to elevate your bathing experience. These ingenious creations offer a convenient platform to hold your essentials, such as books, tablets, candles, and even a glass of wine. Here's why they are gaining immense popularity:

Enhanced Relaxation and Entertainment

Imagine immersing yourself in a warm bath while engrossed in a captivating novel or streaming your favorite show. Bath trays with book and tablet holders eliminate the need to hold your reading material or device, allowing you to fully relax and enjoy your downtime.

Convenience and Organization

Bath trays provide a designated space for your bath essentials, keeping them within reach and preventing clutter. The built-in holders ensure your items are secure and prevent them from falling into the water.

Versatility and Customization

Bath trays come in a variety of shapes, sizes, and materials to suit your preferences and bathroom décor. From minimalist designs to luxurious bamboo trays, there's a perfect option for every bath enthusiast.

Essential Features to Consider

When choosing a bath tray with book and tablet holders, several crucial features should be taken into account:

Size and Dimensions

The size of the bath tray should be appropriate for your bathtub. Ensure it fits comfortably across the edges without obstructing the water flow. Consider the width of the tray to accommodate your essentials and the depth for stability.

Material and Durability

Bath trays are typically made from materials such as bamboo, plastic, or metal. Bamboo is known for its durability, water resistance, and natural elegance. Plastic trays are lightweight and affordable, while metal trays offer a sleek and modern aesthetic. Choose a material that aligns with your style and durability requirements.

Book and Tablet Holders

The book and tablet holders should be secure and adjustable. Look for holders that can accommodate various book sizes and tablet models. Some trays even feature adjustable angles for optimal viewing.

Additional Features

Consider the additional features that might enhance your bath experience. Some trays include:

  • Wine glass holders
  • Candle holders
  • Soap dishes
  • Cup holders
  • Storage compartments
  • Types of Bath Trays with Book and Tablet Holders

    Bath trays with book and tablet holders come in various styles and designs, each catering to specific needs and preferences:

    Standard Bath Trays

    These trays are rectangular and offer a spacious platform for essentials. They typically feature built-in book and tablet holders on either side or in the center.

    Folding Bath Trays

    Folding bath trays are ideal for small bathrooms or limited storage space. They fold flat for easy storage when not in use and extend to provide a generous surface area when needed.

    Expandable Bath Trays

    Expandable bath trays offer versatility by adjusting their width to fit different bathtub sizes. They are perfect for users with varying bath sizes or who need to accommodate additional items.

    Bamboo Bath Trays

    Bamboo bath trays are eco-friendly, durable, and aesthetically pleasing. They provide a warm and natural touch to your bathroom décor. Choose bamboo trays with a water-resistant finish for longevity.

    Tips for Using a Bath Tray with Book and Tablet Holders

    To maximize your bath tray experience, consider these helpful tips:

    Placement and Stability

    Place the tray securely across the tub's edges, ensuring it is balanced and stable. Avoid placing the tray too close to the drain to prevent water from spilling over.

    Water Resistance

    Use a waterproof case for your tablet or ebook reader to protect it from water splashes. If the tray is not water-resistant, place a towel underneath to absorb any potential leaks.

    Safe Usage

    Be cautious when using the tray, especially with hot beverages or candles. Place these items at a safe distance from the water and ensure they are securely positioned.

    Conclusion: Elevating Your Bathtime Routine

    Bath trays with book and tablet holders are more than just a functional addition to your bathroom; they transform your bath experience into a sanctuary of relaxation and entertainment. By considering the features, types, and tips discussed in this guide, you can select the perfect bath tray to enhance your well-being and create a luxurious oasis in your own home.

    Share:

    Simple DIY Shoe Racks That Are Perfect for Craft Fairs

    Simple DIY Shoe Racks That Are Perfect for Craft Fairs

    Simple DIY Shoe Racks That Are Perfect for Craft Fairs

    Looking for a unique and functional craft to sell at your next fair? DIY shoe racks are a popular and practical choice, appealing to a wide range of customers. They're relatively easy to make, require minimal supplies, and offer endless customization possibilities. This article will guide you through creating several simple and stylish shoe rack designs, perfect for showcasing your craft skills and generating sales.

    1. The Ladder Shoe Rack

    This classic design is both visually appealing and incredibly practical. It's perfect for displaying a variety of shoes, from sandals to boots, and can be customized with different finishes and accents.

    Materials:

    • Wooden dowels (various lengths for rungs)
    • Wooden boards (for sides and base)
    • Wood glue
    • Wood screws
    • Sandpaper
    • Wood stain or paint (optional)

    Instructions:

    1. Cut the wood: Measure and cut the wooden boards for the sides and base of the ladder. Cut the dowels to desired lengths for the rungs.
    2. Assemble the sides: Use wood glue and screws to attach the wooden dowels to the sides of the ladder, creating the rungs. Ensure the rungs are evenly spaced and securely fastened.
    3. Attach the base: Secure the base to the bottom of the ladder using wood glue and screws.
    4. Sand and finish: Sand the entire shoe rack to smooth any rough edges. Apply a wood stain or paint for a personalized look (optional).

    Tips:

    • Use different lengths of dowels to create a visually interesting ladder design.
    • Add decorative elements, such as wood beads or rope, to the rungs for a unique touch.
    • Create a tiered ladder design by adding a second, smaller ladder for extra storage.

    2. The Pipe Shoe Rack

    For a modern and industrial look, consider crafting a pipe shoe rack. This design is sleek and minimalist, making it a perfect choice for contemporary homes.

    Materials:

    • Copper or black pipe fittings (elbows, tees, flanges)
    • Copper or black pipe (various lengths)
    • Pipe thread sealant tape
    • Adjustable wrench

    Instructions:

    1. Design your rack: Sketch out your desired pipe shoe rack design. You can create a simple horizontal rack or opt for a more intricate multi-tiered configuration.
    2. Cut the pipe: Measure and cut the pipe to the required lengths using a pipe cutter.
    3. Assemble the rack: Apply thread sealant tape to the pipe threads, then use an adjustable wrench to carefully connect the pipe fittings and pipe sections according to your design.
    4. Secure the base: Attach flanges to the bottom of the rack for stability.

    Tips:

    • For a unique touch, consider adding decorative pipe clamps to the rack.
    • Experiment with different pipe finishes, such as galvanized or powder-coated, for a personalized look.
    • This design is easily customizable to fit different spaces.

    3. The Pallet Shoe Rack

    Upcycle old pallets into a rustic and eco-friendly shoe rack. This design is both budget-friendly and visually appealing, adding a charming touch to any room.

    Materials:

    • Wooden pallet
    • Sandpaper
    • Wood stain or paint (optional)
    • Screws
    • Drill

    Instructions:

    1. Prepare the pallet: Remove any loose nails or staples from the pallet. Sand down any rough edges and splinters.
    2. Clean and finish: Wipe the pallet with a damp cloth to remove any dirt or debris. Apply a wood stain or paint to enhance the rustic look (optional).
    3. Attach shelves (optional): If desired, add additional shelves using wooden boards and screws. Attach them to the pallet to create multiple tiers for shoe storage.

    Tips:

    • Create a tiered pallet rack by stacking two or more pallets on top of each other.
    • Add decorative elements, such as burlap or rope, to the pallet for a unique touch.
    • This design is perfect for displaying a variety of shoes and other accessories.

    4. The Rope and Wood Shoe Rack

    Combine the natural elements of rope and wood to create a rustic and stylish shoe rack. This design is both simple and elegant, adding a touch of farmhouse charm to any space.

    Materials:

    • Wooden dowels (various lengths)
    • Natural rope (thick)
    • Wood glue
    • Scissors or a sharp knife
    • Wood stain or paint (optional)

    Instructions:

    1. Prepare the dowels: Cut the wooden dowels to desired lengths for the rungs of the shoe rack. Sand them down to smooth out any rough edges.
    2. Attach the rope: Cut the rope into equal lengths, slightly longer than the desired spacing between the rungs. Wrap the rope around each dowel, creating a tight coil. Secure the rope ends with wood glue.
    3. Assemble the rack: Attach the dowel rungs, with their rope wrappings, to a wooden base using wood glue or screws. Ensure the rungs are spaced evenly and securely fastened.
    4. Finish: Sand and apply a wood stain or paint to the base and dowels (optional).

    Tips:

    • Use different rope thicknesses and colors to create a visually interesting shoe rack.
    • Add decorative elements, such as wood beads or metal rings, to the rope for a unique touch.
    • This design can be adapted for different heights and sizes, making it perfect for any space.

    Marketing Your DIY Shoe Racks at Craft Fairs

    Once you've perfected your shoe rack designs, it's time to get them ready for sale. Here are some tips for showcasing and marketing your crafts at fairs:

    1. Attractive Display:

    • Showcase your best designs: Select a variety of shoe rack designs to display, highlighting unique features and finishes.
    • Create a visually appealing display: Use a table with a clean tablecloth and arrange the shoe racks in an organized and eye-catching way.
    • Add visual interest: Include props, such as shoes or decorative elements, to showcase the functionality and style of your racks.

    2. Effective Signage:

    • Clear and concise: Use clear and concise signage that highlights the benefits and features of your shoe racks.
    • Pricing: Clearly display the prices of each shoe rack design.
    • Contact information: Include your name and contact information on the signage for potential customers to reach you.

    3. Engage with Customers:

    • Be friendly and approachable: Greet customers with a smile and be ready to answer questions about your products.
    • Highlight the benefits: Explain the functionality and features of your shoe racks, emphasizing their practicality and style.
    • Encourage interaction: Allow customers to touch and examine the shoe racks, fostering a hands-on experience.

    4. Consider Customization Options:

    • Offer different sizes: Offer various sizes and configurations to cater to different needs and spaces.
    • Personalization: Allow customers to choose from a selection of wood finishes, paints, and decorative elements to personalize their racks.
    • Pre-orders: Take pre-orders for customized designs, allowing customers to specify their preferences.

    By following these tips, you can effectively market your DIY shoe racks at craft fairs, attracting customers and generating sales. Remember to focus on quality craftsmanship, attractive presentation, and engaging customer interaction to make your crafts stand out and create a positive impression.

    Share:

    How to Create a Unique Wine Rack to Sell at Markets

    How to Create a Unique Wine Rack to Sell at Markets

    Crafting Unique Wine Racks for Market Success

    In the realm of home decor and wine enthusiasts alike, wine racks stand as a testament to both functionality and style. Their ability to showcase cherished bottles while providing efficient storage makes them indispensable for any wine lover. For those seeking to capitalize on this demand and establish a profitable venture, crafting unique wine racks to sell at markets presents a compelling opportunity. This guide explores the intricacies of creating distinctive and marketable wine racks, from conceptualization to execution.

    Understanding the Market

    Before embarking on the journey of crafting wine racks, it's crucial to understand the existing market dynamics and identify opportunities for differentiation. Conducting thorough market research is essential to gain insights into:

    Target Audience

    Who are your ideal customers? Are they seasoned wine collectors, casual drinkers, or individuals seeking stylish storage solutions? Defining your target audience will shape your design choices, pricing strategy, and marketing efforts.

    Existing Competition

    Assess the competition in your local market. What are their strengths and weaknesses? Are there gaps in the market that your unique offerings can fill? Identifying competitors' offerings can help you differentiate your wine racks.

    Trends and Preferences

    Keep abreast of current trends in home décor and wine storage. Are there specific styles or materials gaining popularity? Understanding these trends allows you to create wine racks that resonate with contemporary tastes.

    Conceptualizing Your Unique Wine Rack

    Once you have a firm grasp of the market, it's time to unleash your creativity and conceptualize a wine rack that stands out from the crowd.

    Materials and Finishes

    The choice of materials will significantly impact the aesthetic, durability, and price point of your wine racks. Explore various options, including:

    • Wood: Durable and versatile, offering a range of finishes and styles. Choose from hardwoods like oak, walnut, or maple, or opt for softer woods like pine or cedar.
    • Metal: Provides a modern and industrial aesthetic, ideal for contemporary interiors. Consider wrought iron, steel, or aluminum.
    • Recycled materials: Sustainable and eco-conscious, using reclaimed wood, salvaged metal, or repurposed objects can add unique character.
    • Glass: A sleek and minimalist option, offering a clear view of the wine bottles.

    Design Considerations

    The design of your wine rack is the cornerstone of its uniqueness. Consider factors like:

    • Shape and Form: Explore unconventional shapes, such as curves, angles, or geometric patterns. Avoid generic rectangular designs.
    • Size and Capacity: Offer a variety of sizes and capacities to cater to different needs, from compact racks for a few bottles to larger units for substantial collections.
    • Functionality: Incorporate features like bottle dividers, labeling holders, or integrated shelves for glasses or accessories.
    • Style and Theme: Align your design with specific themes or aesthetic preferences, such as rustic, modern, minimalist, or eclectic.

    Developing a Prototype

    Before embarking on mass production, create a prototype of your wine rack design. This allows you to test its functionality, refine its aesthetics, and gain valuable feedback from potential customers.

    Crafting Your Wine Racks

    With your design finalized, it's time to transform your vision into tangible products. The crafting process will vary depending on the chosen materials and techniques.

    Tools and Equipment

    Gather the necessary tools and equipment, including:

    • Saw: For cutting wood or metal. Choose a saw appropriate for the material thickness and desired cuts.
    • Drill: For creating holes for screws, bolts, or dowels.
    • Sandpaper: For smoothing surfaces and achieving a polished finish.
    • Clamps: For holding pieces together during assembly.
    • Screwdriver or drill driver: For fastening components.
    • Measuring tools: For accurate measurements and cuts.
    • Finishing materials: Paint, stain, varnish, or other coatings, depending on your desired look.

    Construction Techniques

    Employ appropriate construction techniques for your chosen materials, such as:

    • Woodworking: Use joinery methods like dovetail joints, mortise and tenon, or dado joints for sturdy connections.
    • Metalworking: Utilize welding, soldering, or riveting for joining metal components.
    • Glassworking: Employ specialized techniques like fusing or bending for glass elements.

    Finishing Touches

    Adding finishing touches can elevate your wine rack from ordinary to exceptional. Consider options like:

    • Distressed finishes: Create an aged and weathered look for rustic charm.
    • Stencils or decorative carving: Add intricate details and personalize your designs.
    • Metal accents: Incorporate brass, copper, or iron accents for a touch of sophistication.
    • Lighting: Integrate LED strips or pendant lights to highlight your wine collection.

    Marketing and Selling Your Wine Racks

    With your unique wine racks ready to be showcased, it's time to develop a marketing strategy to capture the attention of potential customers.

    Branding and Packaging

    Create a strong brand identity that reflects your product's quality and uniqueness. Design eye-catching packaging that showcases your wine racks and reinforces your brand message.

    Online Presence

    Establish an online presence through a website or social media channels to showcase your wine racks, provide product information, and engage with potential customers.

    Market Participation

    Participate in local craft markets, farmers' markets, or home décor shows to connect with potential customers and generate sales. Ensure your booth is visually appealing and effectively displays your wine racks.

    Pricing Strategy

    Set competitive prices based on the materials, craftsmanship, and uniqueness of your wine racks. Offer discounts for bulk orders or seasonal promotions.

    Conclusion

    Creating unique wine racks to sell at markets requires a combination of creativity, craftsmanship, and strategic marketing. By understanding the market, conceptualizing a distinctive design, and implementing meticulous construction techniques, you can craft wine racks that captivate customers and drive profitable sales. Embrace your passion for design, experiment with innovative ideas, and elevate the art of wine storage to new heights.

    Share:

    Popular Posts

    Powered by Blogger.

    Pages