How to Make Wooden Bird Feeders That Are Easy to Hang and Maintain

How to Make Wooden Bird Feeders That Are Easy to Hang and Maintain

Building Easy-to-Hang and Maintain Wooden Bird Feeders

Attract feathered friends to your backyard with homemade bird feeders that are both stylish and practical. Building your own feeders allows you to customize them to your liking and ensure they are easy to hang and maintain. This guide will walk you through the steps to create simple, yet effective wooden bird feeders that will bring joy to you and your feathered neighbors.

Choosing the Right Wood

The type of wood you choose will impact both the longevity and aesthetic of your feeder. Here are some good options:

Cedar and Redwood

These woods are naturally resistant to rot and insects, making them ideal for outdoor use. They also have a beautiful, reddish hue that complements any backyard.

Pressure-Treated Pine

This affordable wood is treated to resist moisture and decay, making it a durable choice. However, it's essential to ensure the treatment is safe for birds before using it.

Other Options

You can also use hardwoods like oak or maple, but they may require a protective finish to prolong their lifespan.

Designing Your Bird Feeder

Before you start cutting wood, sketch out your feeder's design. Consider:

  • Size: A feeder that is too small may become overcrowded and attract unwanted pests. A larger feeder can accommodate more birds.
  • Shape: A simple box design is easy to build and clean. You can also get creative with shapes like triangles or hexagons.
  • Perches: Include small branches or dowels for birds to perch on while feeding.
  • Roof: A roof will protect the seed from rain and snow, extending the lifespan of your feeder.

Building the Feeder

Once you have your design, follow these steps:

  • Cut the wood: Using a saw, carefully cut the wood pieces according to your design. Be sure to wear safety glasses and gloves during this process.
  • Assemble the base and sides: Use wood glue and screws to join the base and sides of your feeder. Ensure the pieces fit together tightly.
  • Attach the roof: Cut a piece of wood for the roof and attach it to the base using screws or hinges. If you prefer a removable roof for easy cleaning, use hinges.
  • Install perches: Drill holes into the sides of the feeder to accommodate your perches. Use glue and screws to secure them firmly.
  • Add the feeding tray: Create a tray to hold the seed by cutting a piece of wood slightly smaller than the base of your feeder. Attach it to the inside of the feeder using screws.

Making it Easy to Hang and Maintain

Here are some tips for making your bird feeder user-friendly:

  • Hanging: Drill a hole near the top of the feeder and attach a sturdy wire or rope for hanging. You can also add a hook to the roof for easy hanging.
  • Cleaning: Use a removable roof or design a feeder that is easy to disassemble for cleaning. Regularly cleaning the feeder will prevent mold and bacteria buildup.
  • Filling: Choose a feeder design that is easy to refill, such as one with a large opening or a sliding tray.

Finishing Touches

Once your bird feeder is built, you can add some finishing touches:

  • Paint or stain: You can paint your feeder with bright colors to attract birds or use a natural stain to blend it with your surroundings.
  • Add decorations: You can add birdhouses or other decorative elements to enhance the visual appeal of your feeder.

With a little effort, you can build a beautiful and practical wooden bird feeder that will bring joy to your backyard. Enjoy watching your feathered friends visit your creation and feast on the seed you provide!

Share:

Easy Woodworking Gifts That Are Always in Demand

Easy Woodworking Gifts That Are Always in Demand

Easy Woodworking Gifts That Are Always in Demand

Woodworking is a beloved hobby for many, allowing individuals to create beautiful and functional pieces with their own hands. But beyond personal satisfaction, woodworking offers a wonderful opportunity to craft thoughtful and cherished gifts for friends and family. The beauty of woodworking lies in its versatility, allowing you to create a wide range of gifts tailored to specific interests and needs. This article will delve into a collection of easy woodworking gift ideas that are consistently in high demand, ensuring your creations are both appreciated and treasured.

Practical and Functional Gifts

Practical gifts are always appreciated as they serve a tangible purpose in everyday life. Woodworking lends itself beautifully to crafting functional items, combining aesthetics with utility.

Cutting Boards

Cutting boards are a staple in any kitchen, and they make an excellent woodworking gift. The versatility of cutting boards allows you to personalize them with different wood types, sizes, and designs. You can choose from classic rectangular shapes or explore more unique options like oval or even heart-shaped cutting boards. A personalized touch can be added through laser engraving, adding a name or a special message to enhance the gift.

Serving Trays

Serving trays are another popular choice for woodworking gifts, offering a practical and stylish way to present snacks, drinks, or even meals. The size and shape of a serving tray can be customized to fit specific needs. Incorporating handles for easy carrying further enhances the functionality of the tray. Consider adding a decorative finish with a stain or paint to create a unique look.

Coasters

Coasters are a small but essential item for protecting furniture from condensation rings. Woodworking allows for a wide range of coaster designs, from simple squares to more intricate shapes. You can use different wood species to create a variety of colors and textures. Adding a layer of cork to the bottom enhances the coaster's functionality and prevents scratching on surfaces.

Jewelry Boxes

Jewelry boxes are a thoughtful and sentimental gift for women of all ages. A well-crafted jewelry box provides a safe and organized space for precious items. The design can be tailored to the recipient's style, incorporating intricate carvings, inlaid wood, or a simple yet elegant finish.

Decorative and Ornamental Gifts

Decorative and ornamental gifts add a touch of elegance and personality to any home. Woodworking allows for a wide range of creative expression in these types of gifts.

Picture Frames

Picture frames are a classic and timeless gift, allowing individuals to display cherished photographs and memories. The size and style of the picture frame can be customized to suit the recipient's taste. You can experiment with different wood species, finishes, and even incorporate decorative elements like metal accents or unique wood inlays.

Wall Clocks

Wall clocks are a functional yet decorative addition to any room. Woodworking offers the opportunity to create unique and personalized wall clocks with different shapes, sizes, and wood types. The clock face can be customized with different numbers, fonts, and even intricate carvings.

Ornaments

Ornaments are a perfect gift for the holiday season or any special occasion. Woodworking allows you to create a variety of ornaments, from simple shapes to intricate designs. You can incorporate different wood species, paint, and embellishments to create truly unique ornaments.

Candlesticks

Candlesticks add a touch of warmth and ambiance to any setting. Woodworking enables you to create candlesticks with different styles and designs. You can use different wood species and finishes to create a unique look, and even incorporate decorative elements like carvings or metal accents.

Personalized and Sentimental Gifts

Personalized and sentimental gifts hold special meaning and create lasting memories. Woodworking is ideal for creating gifts that reflect the recipient's interests or commemorate significant occasions.

Engraved Signs

Engraved signs are a personalized gift that can be used for various purposes. They can display a name, a quote, or even a special message. The sign can be customized with different wood species, sizes, and fonts. Adding a decorative finish like a stain or paint enhances the sign's visual appeal.

Custom Wine Racks

Custom wine racks are a thoughtful gift for wine enthusiasts. They provide a stylish and organized way to store wine bottles. You can create wine racks of different sizes and designs, incorporating unique wood species and finishes. Personalizing the wine rack with the recipient's name or initials adds a special touch.

Memory Boxes

Memory boxes are a sentimental gift that allows individuals to store cherished mementos and keepsakes. You can create memory boxes of different sizes and shapes, incorporating different wood species and finishes. Adding a decorative element like a personalized inscription or a small brass plate with a special date enhances the sentimental value.

Personalized Name Tags

Personalized name tags are a practical and thoughtful gift for individuals who frequently attend conferences, workshops, or other events. You can create name tags with different wood species, shapes, and sizes, adding a personal touch with laser engraving or painted designs.

Tips for Successful Woodworking Gifts

Crafting woodworking gifts requires planning and attention to detail. Here are some tips to ensure successful creations:

  • Choose the Right Wood: Consider the recipient's preferences and the purpose of the gift when selecting wood. Some woods are better suited for specific projects due to their properties and aesthetics.
  • Plan Your Project: Before starting, create a detailed plan, including measurements, design details, and materials needed. This ensures a smooth and successful project.
  • Practice Your Techniques: If you're new to woodworking, practice your techniques on scrap wood before working on the actual gift. This helps you avoid mistakes and refine your skills.
  • Safety First: Woodworking involves using sharp tools and machinery. Always prioritize safety by wearing appropriate protective gear and following safety procedures.
  • Finishing Touches: A well-finished piece elevates the overall aesthetic appeal. Consider using stains, paints, varnishes, or oils to create a beautiful and durable finish.
  • Presentation Matters: Present your woodworking gift in a thoughtful manner. You can wrap it in a beautiful box, add a personalized card, or even create a custom display for the gift.

In conclusion, woodworking offers a wonderful opportunity to craft meaningful and cherished gifts for friends and family. By choosing from the wide array of easy woodworking gift ideas presented in this article, you can create personalized and practical pieces that will be treasured for years to come. Remember to prioritize safety, plan your projects carefully, and add your own creative flair to make each gift truly special.

Share:

Customizable Wooden Benches That Will Appeal to Shoppers

Customizable Wooden Benches That Will Appeal to Shoppers

Customizable Wooden Benches That Will Appeal to Shoppers

In the realm of furniture, wooden benches hold a timeless appeal, offering both practicality and aesthetic charm. But in today's market, where personalization reigns supreme, simply offering a standard bench is no longer enough. To capture the attention of discerning shoppers, furniture retailers must embrace the concept of customization, empowering customers to create benches that reflect their individual style and needs.

Customizable wooden benches cater to a diverse range of preferences, from minimalist designs to elaborate statement pieces. By allowing customers to choose from a variety of options, including wood species, finishes, sizes, and even intricate carvings, furniture retailers can cater to the unique tastes of their clientele, fostering a sense of ownership and satisfaction.

Understanding the Appeal of Customization

The growing popularity of customization in the furniture industry can be attributed to several key factors:

Individuality and Expression

In a world saturated with mass-produced goods, consumers crave items that stand out. Customizable furniture allows them to express their personality and create pieces that truly reflect their unique style. A handcrafted wooden bench, meticulously tailored to their specifications, becomes an extension of their home decor and a source of pride.

Functionality and Versatility

Standard benches often fall short of meeting specific needs. By offering customization options, furniture retailers enable customers to create benches that perfectly suit their intended use. Whether it's a spacious bench for a grand foyer, a compact bench for a small hallway, or a bench with built-in storage, customization ensures that the final product seamlessly integrates into the customer's living space.

Uniqueness and Exclusivity

Customizable furniture possesses an aura of exclusivity, appealing to those who appreciate craftsmanship and appreciate the distinctiveness of handcrafted items. Knowing that their bench is one-of-a-kind, created specifically for them, enhances its value and provides a sense of satisfaction that mass-produced furniture simply cannot match.

Key Customization Options

To create truly customizable wooden benches, furniture retailers should offer a wide array of options, empowering customers to craft their ideal pieces.

Wood Species

Offering a diverse selection of wood species allows customers to choose materials that complement their existing furniture and decor. Popular choices include:

  • Oak: Known for its durability, strength, and rich grain pattern, oak is a classic choice for benches.
  • Maple: With its smooth, tight grain and warm, honey-like color, maple provides a refined and elegant aesthetic.
  • Walnut: Its distinctive dark brown hue and intricate grain patterns add a touch of sophistication and warmth.
  • Cherry: Characterized by its reddish-brown tones and subtle grain, cherry wood exudes a timeless charm.
  • Pine: A budget-friendly option, pine offers a light, airy feel and a rustic charm.

Finishes

The finish plays a crucial role in determining the overall look and feel of the bench. Retailers should offer a variety of stains, paints, and protective coatings to cater to different styles and preferences.

  • Stains: Enhance the natural beauty of the wood, allowing the grain patterns to shine through. Stains come in a wide range of colors, from light and natural to rich and dark.
  • Paints: Provide endless possibilities for customization, enabling customers to create bold statements or achieve a more traditional look.
  • Protective Coatings: Help protect the wood from scratches, spills, and UV damage, ensuring the bench's longevity.

Sizes and Dimensions

Offering a range of sizes and dimensions allows customers to create benches that perfectly fit their space. This includes:

  • Length: From compact benches for small spaces to expansive benches for grand entries.
  • Width: To accommodate different seating needs, from individual benches to benches that can seat multiple people.
  • Height: Ensuring the bench is comfortable and functional for its intended use.

Additional Features

Beyond the basic elements, retailers can enhance the customization possibilities by offering additional features:

  • Backrests: Adding comfort and support, especially for benches designed for prolonged seating.
  • Armrests: Provide additional comfort and support, particularly for benches used in living rooms or dining areas.
  • Carvings: Intricate carvings can add a touch of elegance and personalize the bench, reflecting the customer's individual taste.
  • Storage: Built-in storage compartments beneath the seat provide practicality and functionality, especially for benches used in hallways or mudrooms.

Marketing and Sales Strategies

To capitalize on the growing demand for customizable wooden benches, furniture retailers should adopt effective marketing and sales strategies.

Online Customization Tools

Providing customers with interactive online customization tools allows them to visualize their dream bench before making a purchase. These tools should be user-friendly and intuitive, allowing customers to effortlessly select wood species, finishes, sizes, and additional features.

In-Store Customization Experiences

Creating an immersive in-store customization experience allows customers to physically interact with materials, finishes, and design elements. Retailers can display samples of various wood species, color palettes, and hardware options, providing a tangible understanding of the possibilities.

Personalized Consultations

Offering personalized consultations with knowledgeable staff allows customers to discuss their vision and receive expert guidance on selecting the ideal materials, finishes, and features for their customized bench. These consultations should be tailored to each customer's individual needs and preferences.

Showcase Custom Projects

Displaying examples of previously completed custom projects allows customers to see the wide range of possibilities and inspires them to create their own unique benches. Retailers can showcase these projects in their store, on their website, or in social media campaigns.

Conclusion

In a market where customization reigns supreme, embracing the concept of customizable wooden benches presents a significant opportunity for furniture retailers. By offering a wide range of options and providing a seamless customer experience, retailers can empower shoppers to create benches that reflect their individual style, needs, and aspirations. These personalized pieces will not only enhance the aesthetics of homes but also foster a sense of satisfaction and ownership, driving customer loyalty and fostering a positive brand reputation.

Share:

How to Create Custom Wooden Key Racks That Will Sell Online

How to Create Custom Wooden Key Racks That Will Sell Online

Crafting a Winning Niche: Creating Custom Wooden Key Racks for Online Success

In the realm of handcrafted goods, wooden key racks hold a special place. They seamlessly blend practicality with aesthetics, offering a functional solution while adding warmth and charm to any entryway. The growing demand for unique and personalized home décor, coupled with the enduring appeal of wood, presents an excellent opportunity for entrepreneurs to carve a profitable niche in the online marketplace. This article provides a comprehensive guide on creating custom wooden key racks that will resonate with customers and drive successful online sales.

Defining Your Niche: Identifying Your Target Audience and Product Differentiation

Before embarking on your creative journey, it's crucial to define your target audience and differentiate your products. This ensures you cater to specific tastes and needs, fostering a loyal customer base. Here's a framework to guide your thinking:

Identifying Your Target Audience

  • Homeowners: This broad demographic includes those seeking functional and stylish solutions for their entryways.
  • Minimalists: Appeal to customers who value simplicity and clean lines with minimalist designs.
  • Rustic Decor Enthusiasts: Target individuals who appreciate natural elements and handcrafted charm with rustic finishes and reclaimed wood.
  • Modern Homeowners: Cater to modern aesthetics with sleek and contemporary designs, possibly incorporating metal accents.
  • Families: Offer multi-functional key racks with additional storage compartments for mail, notes, or small items.

Product Differentiation: Establishing Your Unique Selling Proposition

  • Customizability: Allow customers to personalize their key racks with their names, initials, or special dates, offering a unique touch.
  • Unique Wood Species: Utilize diverse wood types, such as walnut, cherry, maple, or reclaimed barn wood, to create distinct textures and colors.
  • Design Innovation: Explore unique shapes, sizes, and styles beyond the traditional rectangular key rack. Consider incorporating decorative elements like hooks, shelves, or even a small chalkboard.
  • Sustainable Practices: Highlight your commitment to environmental responsibility by sourcing wood from sustainable forests or using reclaimed wood.
  • Hand-Crafted Quality: Emphasize the artistry and craftsmanship involved in each piece, showcasing the unique imperfections and textures that make handmade items special.

Crafting Excellence: Techniques and Materials for Wooden Key Racks

The heart of your success lies in the craftsmanship of your wooden key racks. Mastering the art of woodworking and selecting the right materials will determine the quality and longevity of your products.

Essential Woodworking Skills

  • Sawing and Cutting: Precision sawing and accurate cuts are fundamental to achieving desired shapes and sizes.
  • Sanding and Finishing: Smooth, even surfaces are essential for both aesthetics and functionality.
  • Drilling and Assembling: Securely attaching hooks and other hardware requires accurate drilling and efficient assembly techniques.
  • Finishing Touches: Applying stains, paints, or varnishes adds protection and enhances the visual appeal of the wood.

Choosing the Right Wood

  • Hardwoods: Oak, maple, walnut, and cherry offer durability, strength, and beautiful grain patterns.
  • Softwoods: Pine and cedar are more affordable but may require additional care to prevent warping or scratches.
  • Reclaimed Wood: Adds a rustic charm and promotes sustainability, but may require special cleaning and preparation before use.

Essential Tools for Wooden Key Rack Construction

  • Power Saw: A table saw, miter saw, or circular saw will help you make accurate and precise cuts.
  • Sanding Tools: Invest in orbital sanders and hand sanding blocks for various levels of smoothing and finishing.
  • Drilling Equipment: A drill driver and a set of drill bits will be needed for attaching hooks, screws, and other hardware.
  • Clamps: Various sizes of clamps will ensure secure and even pressure while assembling and gluing the key rack.
  • Measuring Tools: Accurate measurements are essential for precise cutting and assembly.

Branding and Marketing for Online Success

Crafting beautiful key racks is just the first step. To achieve online success, you must effectively brand and market your products to captivate potential customers.

Developing a Strong Brand Identity

  • Brand Name: Choose a name that reflects the craftsmanship, sustainability, or unique design aspects of your key racks.
  • Logo Design: Create a logo that visually represents your brand values and appeals to your target audience.
  • Brand Story: Share the story behind your craft, your inspiration, and your commitment to quality and design.

Online Marketing Strategies

  • E-commerce Platform: Set up a professional online store using platforms like Shopify, Etsy, or Amazon Handmade to showcase your key racks.
  • High-Quality Photography: Showcase your key racks in natural light with clear and appealing product photos.
  • Social Media Presence: Utilize platforms like Instagram, Pinterest, and Facebook to engage with potential customers, share behind-the-scenes content, and run targeted advertising campaigns.
  • Content Marketing: Create informative blog posts or articles about woodworking, home décor, or key rack design to attract and educate your audience.
  • Search Engine Optimization (SEO): Optimize your online store and website for relevant keywords to improve your ranking in search engine results pages (SERPs).
  • Email Marketing: Build an email list of interested customers and send regular newsletters showcasing new designs, promotions, or special offers.

Providing Excellent Customer Service

Customer service is the cornerstone of long-term success in any business. Go the extra mile to provide exceptional service and build lasting relationships with your customers.

  • Prompt Communication: Respond to customer inquiries promptly and efficiently, whether it's through email, chat, or social media.
  • Personalized Attention: Treat each customer individually, offering customized advice or solutions based on their needs and preferences.
  • Problem-Solving: Address customer concerns and issues quickly and fairly, always striving for a positive resolution.
  • Follow-Up: Check in with customers after they receive their key racks to ensure satisfaction and gather feedback for future improvements.

Conclusion: Unlocking Success with Custom Wooden Key Racks

Creating custom wooden key racks that sell online requires a blend of craftsmanship, branding, marketing, and customer service. By carefully defining your niche, mastering woodworking techniques, developing a strong brand identity, and providing excellent customer service, you can establish a thriving business that unlocks both personal and financial rewards. As you embark on this journey, remember that passion, creativity, and a genuine commitment to quality will be your guiding principles to success in the world of handcrafted goods.

Share:

Lawn Chairs with Customizable Cushions and Finishes for Added Value

Lawn Chairs with Customizable Cushions and Finishes for Added Value

Lawn Chairs with Customizable Cushions and Finishes for Added Value

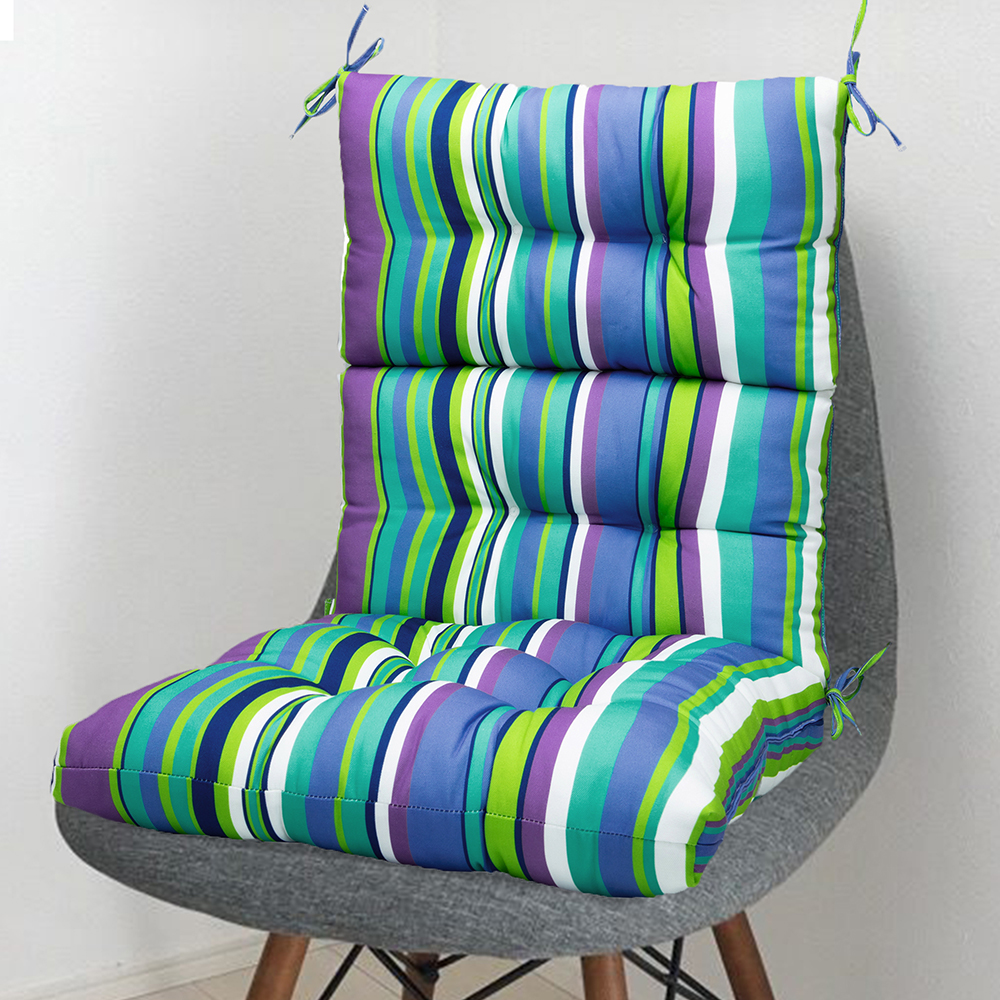
Let's face it: lawn chairs are a staple for outdoor living. Whether you're hosting a barbecue, relaxing by the pool, or simply enjoying a summer evening, these trusty pieces of furniture are always there to provide comfort and support. But what if you could take your lawn chair game to the next level? What if you could personalize your chairs to perfectly match your style and outdoor space?

Introducing the exciting world of customizable lawn chairs! It's not just about function anymore; it's about making a statement. With customizable cushions and finishes, you can create lawn chairs that are as unique as you are. Let's dive into what makes customizable lawn chairs so special and explore the exciting possibilities.

Beyond Basic: Exploring the Customization Options

Gone are the days of settling for generic lawn chairs. Now, you can truly express your personal style by customizing every aspect of your chairs.

Cushions: The Comfort and Style Factor

Cushions are the heart of any comfortable lawn chair. They're where you sink in, relax, and truly enjoy your outdoor time. With customizable cushions, the options are endless:

  • Fabric: From durable canvas and weather-resistant polyester to luxurious, soft chenille, choose a fabric that matches your aesthetic and needs. Consider the amount of use and the elements your chairs will face.
  • Color: Unleash your inner designer! Vibrant hues, calming neutrals, or even bold patterns - make your cushions pop with color. Match your existing patio furniture, create a playful contrast, or even use different colors for each chair.
  • Thickness: Want extra support and comfort? Opt for thicker cushions. Prefer a slimmer, sleeker look? Go for thinner options. Choose the level of comfort that feels right for you.
  • Shape: Round, square, contoured... Choose a cushion shape that complements the chair's design and provides optimal comfort.

Don't forget about the little details! Consider adding decorative piping for a touch of elegance or choose removable covers for easy cleaning and seasonal updates.

Finishes: Adding a Touch of Elegance

The chair's frame is where you can really bring out your personality. Here's how to customize the finishing touches:

  • Paint: From classic white and black to vibrant blues, greens, and reds, paint your chairs to match your outdoor décor. Use a durable, weather-resistant paint that will stand up to the elements. Consider a textured finish or a distressed look for a vintage vibe.
  • Staining: Enhance the natural beauty of wood chairs with a stain. Choose from a wide range of colors and finishes, from light honey to deep mahogany. Apply a protective sealant to ensure the stain lasts.
  • Hardware: Replace the standard hardware with something unique. Choose eye-catching handles, buckles, or decorative accents that complement your chosen style.

Beyond Aesthetics: Why Customize Your Lawn Chairs?

Customization isn't just about making your lawn chairs look fabulous. It also adds value in many ways:

  • Comfort and Functionality: By tailoring the cushions to your specific needs, you ensure maximum comfort. Whether you're looking for extra padding, a particular fabric, or a specific shape, you can create a chair that feels perfect for you.
  • Durability and Longevity: By choosing high-quality materials and finishes that are weather-resistant, you can extend the lifespan of your chairs. This means fewer replacements and more years of enjoyment.
  • Investment: Customizable lawn chairs can be a smart investment. They offer a unique and personalized touch that adds value to your outdoor space. They can also become treasured family heirlooms passed down through generations.
  • Uniqueness and Personality: Customized chairs stand out from the crowd. They reflect your personal style and become a true statement piece for your outdoor area. Imagine the compliments you'll get!

Creating Your Dream Chairs: The Process

The process of customizing your lawn chairs is easier than you might think. Here's a general guide:

  1. Choose your base chairs: Start with a sturdy and well-constructed base chair. Consider the style, size, and material that best suits your needs. You can find great options at furniture stores, online retailers, or even antique shops.
  2. Determine your customizations: Imagine your ideal lawn chair. What color and fabric do you envision for the cushions? What finish will you use on the frame? Sketch out your ideas or gather inspiration from online sources and magazines.
  3. Choose your materials: Once you have a vision, source the materials you need. Look for high-quality fabrics, durable paints, and weather-resistant sealants. If you plan to have a professional handle the customization, gather images of your desired materials and finishes to communicate your vision effectively.
  4. Customization: You can choose to customize the chairs yourself or enlist the help of a professional. There are online resources and DIY tutorials for customizing lawn chairs. For more complex customizations, a professional upholsterer or furniture refinisher can provide expert service.
  5. Enjoy your masterpiece: Once your customized chairs are ready, enjoy the satisfaction of a job well done. Relax, unwind, and bask in the comfort and beauty of your unique outdoor furniture.

Beyond the Chair: Extending Customization

The fun doesn't stop with the chairs! Extend the customization to create a cohesive and personalized outdoor oasis:

  • Matching Cushions: Create a sense of unity by using the same fabric and color scheme for cushions on other outdoor furniture, like benches, ottomans, or even swing sets.
  • Customizable Accessories: Add personalized touches to your outdoor space with customized accessories like throw pillows, blankets, and even outdoor rugs.
  • Matching Tables: Enhance the coordinated look by customizing a matching table. Use the same finish as your chairs or choose a complementary color for a stylish contrast.

Commonly Asked Questions

Q: Are customized lawn chairs expensive?

A: The cost of customizing lawn chairs varies depending on the complexity of the project and the materials you choose. Simple customizations like adding new cushions or painting the frame can be relatively affordable. More complex customizations involving professional upholstery or refinishing can involve higher costs. However, the investment is often worth it for the long-term enjoyment and added value.

Q: How do I care for my customized lawn chairs?

A: Proper care will help your chairs last longer. Use a weatherproof sealant to protect the frame. Remove cushions during harsh weather and store them indoors when not in use. Wash cushion covers regularly according to the fabric's instructions. With a little care, your customized lawn chairs will provide years of enjoyment.

Q: Can I customize my existing lawn chairs?

A: Absolutely! You can often give your existing lawn chairs a makeover with some creativity. Replace the cushions, paint the frame, or even add decorative accents. There are many ways to breathe new life into your old chairs.

Ready to take your outdoor living to the next level? Embark on the journey of customization! Create lawn chairs that are as unique as you are and enjoy the comfort, beauty, and added value they bring to your outdoor space.

Share:

Simple Free Woodworking Plans for Beginners That Don’t Require Special Tools

Simple Free Woodworking Plans for Beginners That Don’t Require Special Tools

Simple Free Woodworking Plans for Beginners That Don’t Require Special Tools

Alright, let’s get this woodworking party started! You’re ready to get your hands dirty and create something awesome, but you’re not quite ready to invest in a whole bunch of fancy tools. Don’t worry, I’ve got you covered. This article is all about beginner-friendly woodworking projects that you can tackle with just basic tools and some free plans. We’re talking about projects that are perfect for learning the ropes, getting comfortable with wood, and building confidence.

No need to stress about complicated jigs or specialized equipment. We’ll be using stuff you probably already have around the house â€" things like a saw, a hammer, and some basic hand tools. Ready to unleash your inner craftsman? Let’s dive in!

Simple & Fun Projects for the Beginner Woodworker

Here are a few beginner-friendly projects that are easy to build and won't break the bank:

1. A Wooden Coasters Set

This is a great project for getting a feel for basic cuts and sanding. Coasters are small, so they're perfect for practicing your skills. You can make them in different shapes and sizes, and personalize them with decorative elements like inlays, paint, or even pyrography (wood burning).

Here’s what you’ll need:

  • Scrap wood (1/2 inch thick is ideal)
  • Saw (handsaw or circular saw)
  • Sandpaper (various grits)
  • Wood glue
  • Optional: Finishing oil or sealant

2. A Birdhouse

Birdhouses are a classic beginner woodworking project. It’s a great way to practice basic joinery techniques and you get a sweet little home for our feathered friends. There are tons of different birdhouse designs online, so you can choose one that suits your style.

Here’s what you’ll need:

  • Scrap wood (1/2 to 3/4 inch thick)
  • Saw (handsaw or circular saw)
  • Drill and drill bits (for pilot holes)
  • Hammer and nails or screws
  • Wood glue
  • Sandpaper
  • Optional: Paint or stain

3. A Wooden Serving Tray

This project is a great way to practice measuring, cutting, and assembling wood pieces. Serving trays are always useful for entertaining or just enjoying a cup of coffee on the porch. You can use a variety of wood types for this project, and you can even add some decorative touches, like handles or a simple design.

Here’s what you’ll need:

  • Wood boards (1/2 to 3/4 inch thick)
  • Saw (handsaw or circular saw)
  • Screwdriver or drill
  • Wood glue
  • Sandpaper
  • Optional: Finishing oil or sealant, decorative hardware

4. A Simple Wooden Shelf

Need some extra storage? A wooden shelf is an easy project that you can customize to fit your needs. You can build it to hold books, plants, or anything else that needs a little extra space.

Here’s what you’ll need:

  • Wood boards (1/2 to 3/4 inch thick)
  • Saw (handsaw or circular saw)
  • Screwdriver or drill
  • Wood glue
  • Sandpaper
  • Brackets (for hanging the shelf)
  • Optional: Finishing oil or sealant

Essential Tools for Your Beginner Woodworking Toolkit

You don’t need a fancy workshop to get started. Here are the basic tools you’ll need for the projects we just discussed:

  • Saw: A handsaw or a circular saw will be your main tools for cutting wood. A handsaw is perfect for smaller cuts, while a circular saw is great for larger pieces and straight lines.
  • Hammer: A hammer is used for driving nails or brads for assembly.
  • Screwdriver: You’ll use this to drive screws for assembly. A cordless drill is really helpful, but you can get by with a manual screwdriver if needed.
  • Measuring Tape: This tool is essential for accurate cutting and measuring.
  • Pencil: A pencil is used for marking lines and drawing patterns on your wood.
  • Wood Glue: Wood glue is used for bonding wood pieces together.
  • Sandpaper: Sandpaper is used to smooth out rough edges and create a finished look.
  • Safety Glasses: Safety glasses protect your eyes from flying debris when cutting or sanding wood.
  • Work Gloves: Gloves protect your hands when working with wood.

You might also find a clamp helpful for holding pieces together while the glue dries.

Finding Free Woodworking Plans

The internet is a treasure trove of free woodworking plans. Here are some great websites where you can find plans for all sorts of projects:

  • Ana White: Ana White is a popular woodworking blogger with a ton of beginner-friendly plans. She also has a fantastic YouTube channel with tutorials.
  • Popular Mechanics: Popular Mechanics has a great selection of free woodworking plans for all skill levels.
  • Instructables: Instructables is a community-based website with a huge collection of woodworking projects and tutorials.
  • Pinterest: Pinterest is a great place to find inspiration and discover woodworking plans. Just search for something like "free woodworking plans for beginners."

Tips for Beginner Woodworkers

Here are a few tips to keep in mind as you embark on your woodworking journey:

  • Start small: Don't get overwhelmed by ambitious projects right away. Choose something simple and manageable to build your skills and confidence.
  • Measure twice, cut once: This old adage is a woodworking essential. Make sure you measure carefully and double-check before making any cuts.
  • Safety first: Always wear safety glasses and gloves, and make sure you have a well-ventilated workspace.
  • Be patient: Woodworking takes time and practice. Don't get discouraged if your first few projects aren't perfect. Keep practicing, and you'll get better with each project.
  • Ask for help: If you're stuck or have a question, don't hesitate to ask for help. There are plenty of resources available online and in your community.

Commonly Asked Questions

Q: Where can I get wood for my projects?

You can find scrap wood at home improvement stores, lumber yards, or even ask friends and neighbors if they have any leftover wood from projects. Local woodworking clubs often have wood swap events where you can find great deals.

Q: What kind of wood should I use for beginner projects?

Pine is a softwood that’s easy to work with and relatively inexpensive. Other good beginner-friendly options include plywood, MDF, and hardwoods like oak or maple.

Q: Do I need to buy expensive tools to get started?

Not at all. You can start with basic hand tools and gradually add more equipment as you progress.

Q: I’m afraid of making mistakes. What if I mess up?

Don’t worry! Everyone makes mistakes, especially when they're learning. The beauty of woodworking is that you can usually fix your mistakes. And even if you can't fix them, you’ll learn from your experience! Just remember, you can always start again.

Now that you have a basic understanding of woodworking for beginners, get out there and start creating! Who knows, you might discover a hidden talent you never knew you had. Enjoy the process, and don’t be afraid to experiment. Happy woodworking!

Share:

The Ultimate Guide to Selling Handmade Cutting Boards

The Ultimate Guide to Selling Handmade Cutting Boards

The Ultimate Guide to Selling Handmade Cutting Boards: From Workshop to Marketplace

Hey there, fellow crafters! You've got the skills, the passion, and the wood. Now it's time to turn your beautiful handmade cutting boards into a booming business. Selling your handcrafted creations isn't just about making something pretty; it's about connecting with customers who appreciate the artistry and quality of your work.

This guide is your roadmap to success, taking you from the initial stages of planning to establishing your brand and reaching hungry buyers. We'll cover everything from choosing the right wood to crafting compelling product descriptions, pricing strategically, and marketing your business effectively. So, grab your favorite beverage, get comfy, and let's dive in!

Crafting Quality Cutting Boards: The Foundation of Success

The foundation of a thriving cutting board business is, of course, the quality of your products. Customers are looking for beautiful, functional, and durable cutting boards that will enhance their kitchens and last for years to come.

Choosing the Right Wood

You have a whole world of wood to choose from, each with its own unique characteristics. Consider these popular options:

  • Hardwoods: Think maple, cherry, walnut, and oak. They're durable, resistant to scratches, and beautiful to look at. Plus, they're naturally antimicrobial, making them ideal for food preparation.
  • Softwoods: Pine and cedar are soft and easy to work with, but they're not as durable as hardwoods. They're perfect for smaller cutting boards or serving boards.
  • Exotic Woods: Add a touch of flair with woods like rosewood, ebony, or teak. They're stunning, but often more expensive.

Don't forget to consider the grain pattern and color of the wood. You want a visually appealing board that complements your customer's kitchen decor.

Building a Solid Foundation

A well-made cutting board is sturdy and stays flat over time. Here are some tips for construction:

  • Secure Joints: If you're using multiple pieces of wood, ensure you use strong glue and clamps for a robust bond.
  • Proper Finishing: Use food-safe finishes like mineral oil or beeswax to protect the wood and make it easy to clean.
  • Edge Detailing: Round or chamfer the edges of the cutting board for a more comfortable and less prone to chipping.

From Workshop to Marketplace: Setting Up Your Business

You've got the skills, the passion, and a workshop full of beautiful cutting boards. Now it's time to turn your hobby into a business.

Choosing Your Sales Channels

Where will you sell your creations? You have options!

  • Online Marketplaces: Etsy, Amazon Handmade, and Shopify are excellent platforms for showcasing your work and reaching a global audience.
  • Craft Fairs and Festivals: Connect directly with customers, showcase your craftsmanship, and build relationships in person.
  • Local Shops and Galleries: Partner with retailers who share your values and appeal to your target audience.
  • Your Own Website: Build a professional online presence to sell directly and establish your brand.

Choose the channels that best fit your goals and resources.

Branding and Storytelling

Your brand is more than just a logo; it's the story you tell about your craftsmanship, your values, and the passion you bring to your work. Here's how to build a strong brand:

  • Develop a Unique Brand Name: Choose a name that reflects your style and captures the essence of your brand.
  • Craft a Compelling Brand Story: Tell your story â€" what inspired you to create cutting boards? What makes your products special?
  • Design a Visual Identity: Create a logo, color palette, and typography that represent your brand.

Think about what makes you different and let your personality shine through.

Pricing Your Products: Striking the Right Balance

Setting the right price is a delicate dance between value and profitability. You want to make a living from your craft, but also remain competitive in the marketplace. Here's how to find that sweet spot:

  • Calculate Your Costs: Factor in materials, labor, packaging, and shipping costs.
  • Research Competitors: See what similar cutting boards are selling for on different platforms.
  • Consider Value: Don't undervalue your handmade work. Your customers are paying for quality, craftsmanship, and a unique story.
  • Offer Variety: Consider different sizes, shapes, and wood types to cater to a broader audience and offer a range of price points.

Remember, price is a powerful message. It communicates the value of your work and your brand.

Marketing Your Handmade Cutting Boards: Reaching Your Customers

Creating stunning cutting boards is just the first step. Now it's time to get the word out and attract customers.

Creating Compelling Product Descriptions

Your product descriptions are your chance to engage customers and tell the story behind your craftsmanship.

  • Highlight Unique Features: What makes your cutting boards special? Do they have a unique grain pattern, a particular finish, or a special story behind them?
  • Use Descriptive Language: Don't just say "cutting board." Use words like "rustic," "elegant," "durable," and "handcrafted."
  • Include Care Instructions: Make it easy for customers to maintain their cutting boards.

Paint a picture with your words and make customers feel like they can already see these beautiful boards in their kitchens.

Social Media Marketing: Building a Following

Social media is your chance to connect with potential customers, share your passion for woodworking, and build a community around your brand.

  • Choose the Right Platforms: Where do your ideal customers hang out? Instagram, Facebook, Pinterest, and TikTok are popular choices for showcasing your work.
  • High-Quality Photography: Your photos are your virtual shop window. Use natural light, focus on details, and showcase your boards in a beautiful setting.
  • Engage with Your Audience: Respond to comments, ask questions, and run contests to build a relationship with your followers.

Social media is a great way to build trust and show the human side of your business.

Beyond Social Media: Other Marketing Strategies

Don't just rely on social media. Here are a few other marketing strategies:

  • Email Marketing: Build an email list and send regular newsletters with new products, promotions, and behind-the-scenes content.
  • Paid Advertising: Use targeted ads on social media or search engines to reach a wider audience.
  • Partnerships and Collaborations: Team up with other businesses in complementary fields (like food bloggers or kitchen retailers) to cross-promote your products.

Experiment with different strategies and see what works best for you.

Frequently Asked Questions

You've got questions, we've got answers! Here are some common questions about selling handmade cutting boards.

How much should I charge for my cutting boards?

The price of your cutting boards should reflect your costs, your skill level, and the perceived value of your products. Research competitors, calculate your costs, and consider the unique features of your cutting boards.

What kind of wood should I use for my cutting boards?

Hardwoods like maple, cherry, walnut, and oak are ideal for cutting boards because they're durable, resistant to scratches, and beautiful to look at. They're also naturally antimicrobial, making them safe for food preparation.

How do I finish my cutting boards?

Use food-safe finishes like mineral oil or beeswax to protect the wood and make it easy to clean. Avoid using varnishes or paints, as these can be harmful to food.

What are the best places to sell my cutting boards?

Online marketplaces like Etsy, Amazon Handmade, and Shopify are great options for reaching a global audience. You can also sell at craft fairs and festivals, partner with local shops and galleries, or even start your own website.

Selling handmade cutting boards can be a rewarding journey. By focusing on quality, building a strong brand, and connecting with your customers, you can create a successful business that you'll love for years to come. Good luck, and happy crafting!

Share:

Step-by-Step Wood Project Ideas to Tackle Over the Weekend

Step-by-Step Wood Project Ideas to Tackle Over the Weekend

Weekend Woodworking Projects: Fun and Functional Projects for All Skill Levels

A weekend filled with the aroma of sawdust and the satisfying thud of hammer on wood? Yes, please! Woodworking is a rewarding hobby that lets you create practical, beautiful, and personalized pieces for your home and beyond. Even if you're a complete beginner, there are plenty of simple and achievable projects you can tackle over a weekend. Let's delve into some ideas that'll ignite your creative spark and leave you with a sense of accomplishment.

Beginner-Friendly Projects

If you're just starting out, these projects will help you gain confidence and hone your woodworking skills without overwhelming you.

Simple Wooden Coasters

Start with the basics! These are small, easy to manage, and perfect for practicing cutting and sanding techniques. Choose a beautiful hardwood like cherry or maple for a stunning finish.

  • Gather your supplies: Wood squares (1/2" thick), sandpaper (various grits), wood glue, finishing oil or varnish, protective coating (optional), and a drill (for optional decorative holes).
  • Cut the wood: Using a saw or jigsaw, cut the wood into 4" x 4" squares.
  • Sand the edges: Start with rough grit sandpaper to remove any rough edges and gradually transition to finer grit sandpaper for a smooth finish.
  • Apply finish: Choose your preferred finish â€" oil, varnish, or a sealant. Apply a thin, even coat and let it dry completely.
  • Decorate (optional): Add decorative elements like burn marks, laser etching, or wood inlay for a unique touch.
  • Rustic Wooden Wall Shelf

    A simple shelf can transform a bare wall into a charming display space. This project involves basic cuts, sanding, and assembly.

  • Gather your supplies: Wood boards (1x6 or 1x8), wood glue, screws, drill, saw, sandpaper, and finishing oil or stain (optional).
  • Cut the boards: Use a saw to cut the boards to your desired shelf size. Cut two pieces for the shelf and two pieces for the sides.
  • Sand the edges: Smooth out any rough edges with sandpaper.
  • Assemble the shelf: Apply wood glue to the ends of the shelf boards and attach them to the sides. Secure with screws for added stability.
  • Finish (optional): Apply a stain or oil to enhance the natural beauty of the wood.
  • Intermediate Projects

    Once you've mastered the basics, you can try some more challenging projects that will expand your woodworking skills.

    Wooden Cutting Board

    A custom cutting board makes a practical and thoughtful gift. This project requires accurate cutting, precise joining techniques, and a smooth finish.

  • Gather your supplies: Hardwood boards (maple, walnut, cherry), wood glue, clamps, router (optional for rounded edges), saw, sandpaper, mineral oil or food-safe sealant.
  • Cut the boards: Cut the boards to your desired size and shape.
  • Join the boards: Use wood glue and clamps to join the boards together, ensuring a tight, even fit.
  • Shape the edges (optional): Use a router to create rounded edges for a more refined look.
  • Sand and finish: Sand the board thoroughly with progressively finer grit sandpaper. Apply mineral oil or food-safe sealant to protect the surface and make it water-resistant.
  • Simple Wooden Bench

    A sturdy bench is a versatile addition to any space, from a porch to a garden. This project involves working with larger pieces of wood, securing joints, and applying a durable finish.

  • Gather your supplies: Wood boards (2x4 or 2x6), wood screws, drill, saw, sandpaper, wood glue, clamps, and finishing oil or stain (optional).
  • Cut the boards: Cut the boards to the desired dimensions for the legs, seat, and back.
  • Assemble the frame: Securely attach the legs to the seat frame using screws and glue.
  • Attach the back: Position the back support pieces onto the frame and secure with screws and glue.
  • Sand and finish: Sand the bench thoroughly and apply a finish to protect and enhance the wood.
  • Advanced Projects

    For those who want to push their woodworking skills to the next level, these projects offer a greater challenge and a sense of accomplishment.

    Wooden Coffee Table

    A coffee table is a statement piece that adds character to your living room. This project demands precise measurements, intricate joinery, and a polished finish.

  • Gather your supplies: Wood boards (various sizes and thicknesses), wood glue, clamps, saw, sandpaper, router (optional for detailed edges), wood screws, drill, and finishing oil, stain, or varnish.
  • Design the table: Sketch out the design, taking into account the table's dimensions, shape, and desired features.
  • Cut and assemble the frame: Cut the boards according to your design and join them using glue, screws, or mortise-and-tenon joints for a strong and secure frame.
  • Add the tabletop: Cut and attach the tabletop to the frame, using glue, screws, or dovetail joints.
  • Sand and finish: Sand the table thoroughly and apply a finish to protect and enhance the wood.
  • Custom Wooden Desk

    Create a work space that's as unique as you are! Building a custom wooden desk requires a high level of skill, attention to detail, and a solid understanding of woodworking techniques.

  • Gather your supplies: Wood boards (various sizes and thicknesses), wood glue, clamps, saw, sandpaper, router (optional for detailed edges), wood screws, drill, and finishing oil, stain, or varnish.
  • Design the desk: Sketch out the design, incorporating features like drawers, shelves, and a comfortable workspace.
  • Cut and assemble the frame: Cut the boards according to your design and join them using glue, screws, or mortise-and-tenon joints for a strong and secure frame.
  • Add drawers, shelves, and other features: Create and attach drawers, shelves, and other components according to your design.
  • Sand and finish: Sand the desk thoroughly and apply a finish to protect and enhance the wood.
  • These are just a few ideas to get you started. The possibilities are endless with woodworking! Remember to prioritize safety, take your time, and most importantly, enjoy the process. Embrace the challenges, celebrate your successes, and let your creativity flow through the sawdust!

    Share:

    How to Build Wooden Toy Sets That Offer Hours of Fun for Kids

    How to Build Wooden Toy Sets That Offer Hours of Fun for Kids

    Building Wooden Toy Sets: A Journey of Creativity and Joy

    Hey there, crafty parents and aspiring toy makers! Ever wished you could create something special for your little ones, something that sparks their imagination and brings hours of fun? Well, you're in the right place! We're about to dive into the wonderful world of building wooden toy sets. Not only is it a rewarding experience, but it's also a chance to instill a love for handcrafted toys and a connection to the magic of wood.

    So, grab your tools, gather your inspiration, and let's embark on this creative journey together. Get ready to learn, laugh, and maybe even unleash your inner child as we navigate the exciting process of building wooden toy sets for your little ones.

    Choosing the Right Wood for Your Wooden Toy Set

    The heart and soul of any wooden toy set lies in the wood itself. So, let's talk about finding the perfect material for your creation:

    Hardwood Heroes

    Hardwoods, like maple, oak, and cherry, are renowned for their strength, durability, and beautiful grain patterns. They hold up to wear and tear, making them ideal for toys that will be loved and played with for years to come. Plus, the natural beauty of hardwoods adds a touch of elegance and charm to your creations.

    Softwood Sweetness

    Don't discount softwoods like pine and cedar! They're easier to work with, making them a great choice for beginners. They're also naturally light and forgiving, perfect for intricate designs. Just keep in mind that softwoods might be prone to scratches and dents over time.

    Plywood Power

    Plywood is a versatile and affordable option. It's a good choice for building sturdy bases, platforms, and even intricate structures. Look for plywood with a smooth finish to ensure a safe and enjoyable playing experience.

    Gathering Your Tools: A Crafty Arsenal

    No woodworking project is complete without the right tools. Here's a basic toolkit to get you started:

    • Saw: A handsaw or a jigsaw will be your trusty companion for cutting wood to size.
    • Screwdriver: A Phillips head screwdriver is essential for assembling your toy set. A cordless drill can make the job even faster and smoother.
    • Hammer: For driving nails and securing pieces together, a hammer is a must-have.
    • Sandpaper: Smooth out rough edges and give your wood a polished finish. Use a variety of grits for different stages of sanding.
    • Clamps: Keep your pieces secure while you work. Use clamps to hold them together during assembly.
    • Measuring Tape: Accuracy is key, so always measure twice and cut once!
    • Pencil: Mark your wood before you cut or drill to ensure precise cuts and a beautiful final product.

    These are just the basics, but as you progress and get more comfortable with woodworking, you can add specialized tools to your arsenal.

    Designing Your Dream Toy Set: Where Imagination Takes Flight

    Now comes the fun part - designing your toy set! Let your creativity run wild!

    Playful Themes

    What themes capture your child's imagination? Do they love animals, pirates, outer space, or magical creatures? Choose a theme that resonates with their interests and allows you to create a truly special set.

    Shape and Size

    Think about the size and shape of each element in your toy set. Will it be a miniature town with houses and shops? A whimsical train set with tracks and carriages? Or a playful farm with animals and fences? Consider the scale and how it will fit into your child's play space.

    Safety First

    Always prioritize safety! Avoid sharp corners and edges, and ensure all parts are securely attached. Use non-toxic paints and finishes to protect your little ones.

    Building Your Wooden Toy Set: From Plan to Play

    Let's get our hands dirty and bring your design to life!

    Cutting and Shaping

    Based on your design, cut and shape your wood pieces using your trusty saw. Take your time, and be sure to make precise cuts to ensure everything fits together perfectly.

    Sanding and Finishing

    Sand each piece thoroughly to remove rough edges and create a smooth surface. Then, apply a sealant or varnish to protect the wood and add a touch of polish. You can even paint your pieces with child-friendly paints or stain them for a more rustic look.

    Assembly Magic

    Now for the exciting part - assembling your toy set! Follow your design plans, using glue, screws, or nails to secure the pieces together. Make sure everything is sturdy and well-built to withstand the joy of playtime.

    Adding the Finishing Touches: A Touch of Magic

    Now comes the fun part - adding those special details that make your wooden toy set truly unique:

    • Painting: Bring your toy set to life with vibrant colors. You can paint it with non-toxic paints, or use a natural stain for a more rustic look.
    • Decorative Touches: Add embellishments like felt, buttons, fabric scraps, or even natural elements like twigs and leaves. Get creative and let your imagination flow!
    • Personalization: Make your toy set truly special by personalizing it with your child's name or a special message.

    Preserving the Joy: Caring for Your Wooden Toy Set

    With a little care, your wooden toy set will bring joy for years to come. Here are some tips to keep it looking its best:

    • Clean with a damp cloth: Wipe away dust and dirt gently with a damp cloth. Avoid harsh chemicals or abrasive cleaners.
    • Store it safely: When not in use, store your toy set in a dry and cool place to prevent warping or damage.
    • Minor repairs: Over time, minor scratches or dents may appear. You can easily repair them with wood filler or touch-up paint.

    Commonly Asked Questions

    What safety precautions should I take when building wooden toys?

    Safety is paramount! Avoid sharp corners and edges, and ensure all parts are securely attached. Use non-toxic paints and finishes, and consider using rounded edges or smooth sandpaper to minimize the risk of splinters.

    What if I don't have any woodworking experience?

    Don't worry! Start with simple designs and gradually increase the complexity as you gain confidence. There are countless online resources and tutorials that can guide you every step of the way.

    Where can I find inspiration for wooden toy set designs?

    Let your imagination soar! Flip through magazines, browse online, or visit your local craft store. Pay attention to your child's interests and build a toy set that reflects their unique personality.

    Remember, building wooden toys is a journey of creativity and love. Embrace the process, have fun, and create something truly special for your little ones. The joy they experience playing with your handcrafted creations will be priceless!

    Share:

    How to Build and Sell Wooden Bird Feeders with a High-End Look

    How to Build and Sell Wooden Bird Feeders with a High-End Look

    From Backyard Basics to Bird Feeder Boutique: Building and Selling High-End Feeders

    Hey there, fellow bird enthusiast! Are you looking to turn your love for feathered friends into a profitable side hustle? Building and selling wooden bird feeders with a high-end look can be a rewarding and creative way to do just that. Think beyond the standard plastic feeders you find at the big box stores â€" we're talking about handcrafted masterpieces that will make your customers say, "Wow!"

    It's not just about attracting birds; it's about adding a touch of elegance and artistry to your customers' outdoor spaces. In this guide, we'll delve into the world of building and selling high-end wooden bird feeders, covering everything from design inspiration to marketing strategies.

    Step 1: Design Inspiration and Niche

    The first step is to get inspired! Browse high-end home décor websites and magazines. Look at birdhouses, sculptures, and even furniture to get a feel for what resonates with you. Consider these questions:

    • What styles appeal to you? Rustic, modern, minimalist?
    • What materials are you drawn to? Reclaimed wood, cedar, or even exotic hardwoods?
    • What are your unique skills? Do you love intricate carvings, detailed painting, or adding metal accents?

    Once you have a good sense of your aesthetic, it's time to define your niche. What kind of bird feeders will you specialize in? Will you create feeders for specific bird species, like hummingbirds or finches?

    Example Niches:

    • Rustic Farmhouse Feeders: These feeders often use reclaimed wood and natural finishes, featuring simple, elegant designs.
    • Modern Minimalist Feeders: Think clean lines, geometric shapes, and sleek metal accents. These feeders are ideal for contemporary gardens.
    • Hummingbird Haven: Offer feeders specifically designed for hummingbirds, with vibrant colors, intricate details, and specialized feeding ports.

    Step 2: Crafting Your Feeders

    Now comes the fun part: turning your design ideas into reality!

    Materials and Tools:

    • Wood: Choose durable and weather-resistant wood like cedar, redwood, or treated pine. Consider using reclaimed wood for a rustic touch.
    • Hardware: Stainless steel screws, hooks, wire mesh, and feeder trays are essential.
    • Finishing Touches: Stains, paints, varnishes, and weather-resistant finishes protect your feeders and add color.
    • Tools: Hand saws, drills, sanders, measuring tape, and woodworking clamps.

    Construction Techniques:

    • Plan and Sketch: Create detailed plans or sketches to ensure a successful build.
    • Cut and Shape: Use precise measurements and proper cutting techniques to create the feeder’s main body.
    • Assembly: Join the pieces together securely using screws, glue, or dowels.
    • Finishing Touches: Sand the feeder smoothly, apply finishes, and attach any decorative elements.

    Don't be afraid to experiment! Explore different wood textures, combine materials, and let your creativity flow.

    Step 3: Building a Brand

    You've got the skills, now it's time to showcase your talent! Building a strong brand will attract customers and set you apart from the competition.

    Name and Logo:

    • Name: Choose a memorable name that reflects your style and niche. Consider using words like "Artisan," "Handmade," or "Natural."
    • Logo: Create a visually appealing logo that represents your brand. It can be a simple bird silhouette, a stylized tree, or a unique design that incorporates your materials or style.

    Marketing Strategy:

    • Website and Social Media: Create a website showcasing your feeders, pricing, and contact information. Utilize platforms like Instagram and Facebook to share beautiful photos of your creations and engage with potential customers.
    • Online Marketplaces: List your feeders on Etsy, Amazon Handmade, or other platforms to reach a broader audience.
    • Local Events: Participate in craft fairs, farmers markets, and gardening events to connect with customers in person.
    • Collaborations: Partner with local garden centers, birdwatching clubs, or gift shops to sell your feeders.

    Remember, consistency is key. Post regularly on social media, update your website with new products, and engage with your followers.

    Step 4: Pricing and Profitability

    How do you price your high-end feeders to ensure a healthy profit while still being attractive to customers? Consider these factors:

    • Materials: Factor in the cost of wood, hardware, and finishes.
    • Time Investment: Account for the time it takes to design, build, and finish your feeders.
    • Market Research: Research competitor prices and see what similar feeders are selling for.
    • Value Proposition: Highlight the quality, craftsmanship, and uniqueness of your feeders to justify a higher price point.

    Don't be afraid to price your feeders competitively. Your unique craftsmanship and design aesthetic are what will set you apart.

    Step 5: Customer Service and Feedback

    Excellent customer service is crucial for building a loyal following. Here are some tips:

    • Response Time: Be prompt in responding to inquiries and orders.
    • Clear Communication: Provide detailed product descriptions, shipping information, and care instructions.
    • Personalized Touch: Add a handwritten note, thank-you card, or small gift with each order.
    • Feedback: Encourage customer feedback and use it to improve your products and services.

    Remember, happy customers will spread the word about your brand and become your best ambassadors.

    Commonly Asked Questions

    How can I make my feeders more bird-friendly?

    Use a variety of feeding ports and designs to attract different bird species. Avoid using bright colors, as they can scare away some birds. Consider adding perches or landing platforms to make your feeders more accessible.

    What kind of finishes should I use for outdoor feeders?

    Choose weather-resistant finishes like marine varnish, polyurethane, or oil-based paints. Avoid using water-based paints, as they may not hold up well to the elements.

    How can I protect my feeders from squirrels?

    Use squirrel-proof feeders or add squirrel baffles to your feeders. Squirrel baffles are cone-shaped devices that prevent squirrels from climbing up to the feeder.

    What are the best ways to advertise my feeders?

    Use a combination of online marketing (website, social media, online marketplaces) and local events (craft fairs, farmers markets). Consider partnering with local businesses or birdwatching clubs to promote your feeders.

    Building and selling high-end wooden bird feeders is a rewarding journey filled with creativity, craftsmanship, and the joy of connecting with nature. By following these steps and nurturing a love for your craft, you can turn your passion into a successful business. Good luck!

    Share:

    How to Build and Sell Wooden Chess Tables with High-End, Artistic Features

    How to Build and Sell Wooden Chess Tables with High-End, Artistic Features

    Crafting and Selling Wooden Chess Tables with Artistic Flair

    Imagine this: You're hosting a game night, and your friends gather around a magnificent chess table. Its surface is a work of art, with intricate wood carvings and elegant inlay patterns. The pieces are handcrafted, each one unique and beautiful. The entire table exudes a sense of luxury and craftsmanship, making the game itself feel special and unforgettable. That's the kind of experience you can create by building and selling wooden chess tables with high-end, artistic features.

    This isn't just about making a functional chess table. It's about creating a piece of furniture that's both beautiful and functional, a conversation starter, and an heirloom to be passed down through generations. It's about combining your passion for woodworking with your artistic vision to create something truly special.

    So, how do you go about crafting and selling these unique pieces? Let's dive into the details.

    Building the Foundation: Choosing the Right Wood and Design

    The first step is to choose the right wood. You want a wood that's strong, durable, and beautiful, and that will hold up to the wear and tear of regular use. Some excellent choices include:

    • Hardwoods like maple, cherry, walnut, and mahogany offer excellent durability, a beautiful grain pattern, and a rich finish.
    • Exotic woods like rosewood, ebony, and zebrawood provide striking visual appeal and can add a touch of luxury.
    • Sustainable woods like bamboo and reclaimed lumber are excellent choices for eco-conscious customers.

    Once you've chosen your wood, it's time to think about the design. Here are some factors to consider:

    • Size: Standard chessboard size is 19" x 19", but you can customize it based on your preferences.
    • Shape: Most tables are rectangular, but you can also explore round, octagonal, or even custom shapes.
    • Style: Consider the style of the table â€" modern, traditional, rustic, or something else entirely.
    • Features: Think about incorporating features like storage drawers, inlaid chessboard squares, and even built-in cup holders.

    Sketch out your ideas and experiment with different wood combinations. This will help you refine your design and create a unique table that reflects your personal style.

    Adding Artistic Flair: Enhancing the Design with Craftsmanship

    Now comes the fun part â€" incorporating those high-end, artistic features that will set your chess tables apart.

    Intricate Wood Carvings

    Hand-carved details can transform a simple table into a work of art. You can carve elegant scrollwork, stylized animal figures, or geometric patterns into the table legs, aprons, or even the board itself. Consider using different wood species for carving accents, like ebony for dark details against a light wood background.

    Exquisite Inlay Work

    Inlay is a technique where different woods or materials are inserted into the surface of the table, creating intricate patterns and designs. This can be done on the board, the table top, or even the legs. You can use contrasting woods, mother-of-pearl, bone, or metal to create truly stunning visual effects.

    Hand-Painted Details

    Adding hand-painted details can infuse your table with personality. Paint the board with a custom design, add floral motifs, or create a scenic background inspired by nature. This can be a great way to personalize the table and make it truly unique.

    Unique Chess Pieces

    Don't forget the chess pieces! They're an integral part of the artistic experience. You can carve them from wood, cast them in metal, or even use unique materials like ceramic or stone. Consider designing them in a style that complements the table's design.

    Building the Business: Marketing and Sales

    Once you've crafted your exquisite chess tables, it's time to bring them to the world. There are several avenues you can explore for marketing and sales:

    • Online Marketplaces: Platforms like Etsy, Amazon Handmade, and Shopify are great for showcasing your work to a wider audience.
    • Social Media Marketing: Instagram, Facebook, and Pinterest are fantastic for sharing photos of your tables and engaging with potential customers.
    • Craft Fairs and Shows: Participating in local craft fairs and art shows allows you to connect with customers in person, showcase your work, and gain valuable feedback.
    • Word-of-Mouth Marketing: Networking and referrals can be powerful tools for building your clientele.
    • Collaborations: Partnering with interior designers, galleries, or even furniture stores can expand your reach and introduce your work to new audiences.

    Remember, the key is to tell your story and highlight the unique craftsmanship behind your tables. Use high-quality photographs, compelling descriptions, and engaging storytelling to capture the attention of potential buyers.

    Frequently Asked Questions

    Here are some common questions you might have about crafting and selling wooden chess tables with artistic features:

    What are the costs associated with this venture?

    The cost of materials will vary depending on the type of wood you choose and the complexity of your design. You'll also need to factor in tools, equipment, finishing supplies, and marketing expenses.

    How much can I charge for a custom chess table?

    Prices will vary based on the size, complexity, and materials used. Research competitors and consider the time and effort involved in creating each piece. Be confident in your pricing and value the artistry and craftsmanship you bring to your work.

    How can I protect my designs?

    You can file for a copyright to protect your original designs. However, this is only for the specific design and not the general concept of a chess table. Consider incorporating unique elements that make your pieces truly distinct.

    Is there a specific market for high-end chess tables?

    Absolutely! There's a growing market for handcrafted and artistic furniture, and chess tables with unique features appeal to individuals who appreciate quality, craftsmanship, and artistic expression.

    Creating and selling artistic wooden chess tables is a rewarding journey that combines passion, creativity, and business acumen. Embrace the challenge, refine your craft, and enjoy the process of bringing beautiful, functional works of art to the world.

    Share:

    Pencil Holder Projects That Add Function and Style to Any Desk

    Pencil Holder Projects That Add Function and Style to Any Desk

    Pencil Holder Projects That Add Function and Style to Any Desk

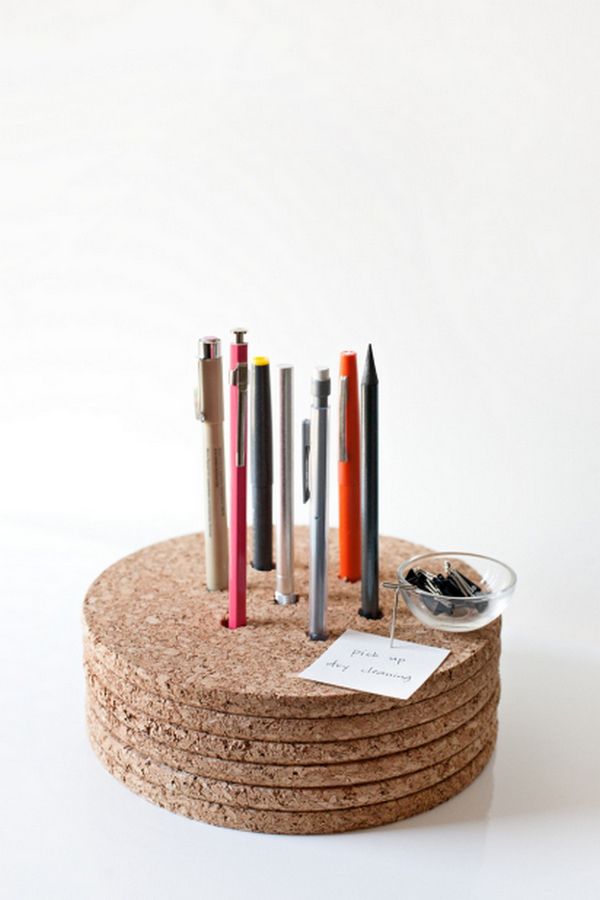
    Hey there, fellow desk dwellers! Let's face it, a messy desk is the bane of our existence. Pens scattered everywhere, paper clips rolling off the edge, and that never-ending pile of sticky notes... it's enough to make anyone lose their focus. But fear not, because I'm here to share some fun and easy pencil holder projects that will add both function and style to your workspace!

    These projects are perfect for anyone, whether you're a seasoned DIY pro or just starting out. And the best part? They don't require a ton of time or fancy materials. So grab your craft supplies, put on your favorite playlist, and let's get creative!

    Upcycled Wonders: Giving Old Things a New Life

    Before we dive into brand new projects, let's explore the magical world of upcycling! Giving old items a new purpose is not only eco-friendly but also a great way to add unique character to your desk. Here are some ideas:

    Tin Can Transformations

    Those empty soup cans cluttering your pantry? Time to give them a makeover! Simply rinse them out, remove any labels, and let your imagination run wild.

    • Painted Patterns: Grab some acrylic paint and create geometric designs, abstract patterns, or even whimsical animal prints. Get creative!
    • Decoupage Delight: Cover the can with colorful paper, fabric scraps, or even magazine clippings. Secure it with mod podge for a long-lasting finish.
    • Washi Tape Wonderland: Washi tape is a lifesaver for DIY projects. Simply wrap the can with different patterns and colors for a quick and easy update.

    Mason Jar Magic

    Mason jars are a DIY enthusiast's best friend! They're versatile, affordable, and just plain adorable. Here are some ways to turn a mason jar into a stylish pencil holder:

    • Simple and Chic: Wash the jar, remove the lid, and you're done! It's a classic, timeless look that always works.
    • String Art Spectacle: Wrap string or yarn around the jar in different patterns to create a unique and eye-catching design. Perfect for a boho vibe.
    • Chalkboard Charm: Use chalkboard paint to create a writable surface on the jar. Write motivational quotes, to-do lists, or just doodle! It's both functional and fun.

    Creative Cardboard Creations

    Who knew cardboard could be so versatile? You can find it just about anywhere (think cereal boxes, Amazon boxes, and even those cardboard tubes from wrapping paper), and it's the perfect material for a quick and easy pencil holder project. Let's get crafty!

    Cardboard Tube Charm

    Those cardboard tubes from wrapping paper are begging to be turned into something amazing! Simply cut them to your desired height and get creative.

    • Color Splash: Paint the tube in bright colors, create geometric patterns, or even add glitter for a touch of sparkle.
    • Fabric Fun: Cover the tube with fabric scraps, felt, or even patterned paper. Secure it with glue or fabric tape.
    • Nature's Beauty: Wrap the tube with natural materials like twine, burlap, or even dried leaves and flowers. It's a perfect touch for an earthy aesthetic.

    Cardboard Box Makeover

    Don't throw away those cardboard boxes! They can easily be transformed into a unique and stylish pencil holder. Here's how:

    • Cut and Decorate: Cut the box to your desired size and shape. Then, unleash your inner artist! Paint it, decoupage it, or add embellishments like buttons, ribbons, or even beads.
    • Create Compartments: Use cardboard dividers or cutouts to create separate compartments within the box for organizing different items like pens, pencils, scissors, and even your phone charger.
    • Fold and Glue: Fold a cardboard sheet to create a rectangular box with compartments. Secure the edges with glue or tape for a simple and sturdy pencil holder.

    Beyond the Ordinary: Adding a Personal Touch

    Now that we've covered some basic ideas, let's get really creative! These projects are all about letting your personality shine through. So, let's explore some unique and inspiring options:

    The Concrete Jungle

    For a truly industrial and modern vibe, try creating a pencil holder out of concrete. It's surprisingly easy and looks absolutely stunning. You can find concrete mix at most hardware stores. Simply create a mold using a plastic container or even a silicone baking mold. Pour in the concrete mix, let it set, and then remove the mold. Voila! You have a unique and sturdy pencil holder. You can even add color to the concrete by mixing in acrylic paint.

    The Bookworm's Delight

    If you're a book lover, why not incorporate books into your desk decor? Find an old, hardback book with a beautiful cover and remove the pages (don't throw them away! They can be used for other crafts). Use glue or tape to secure the book's spine so it stands upright. Now, you have a vintage-inspired pencil holder that's both functional and stylish. You can even use a bookend to keep the book upright for a more secure base.

    The Nature Lover's Sanctuary

    Bring the outdoors in with a nature-inspired pencil holder. Gather twigs, branches, pine cones, or even seashells to create a unique and rustic design. You can use hot glue to secure these natural elements to a base made of cardboard, wood, or even a clay pot.

    Final Thoughts: Let Your Creativity Flow

    There you have it! A whole world of pencil holder possibilities right at your fingertips. Remember, the key to creating a great pencil holder is to have fun and let your personality shine through. Experiment with different materials, colors, and patterns. Don't be afraid to make mistakes! It's all part of the creative process. And most importantly, enjoy the process and the end result. Happy crafting!

    Share:

    How to Sell Handmade Wooden Key Holders Successfully

    How to Sell Handmade Wooden Key Holders Successfully

    Crafting Your Way to Success: How to Sell Handmade Wooden Key Holders

    Hey there, fellow crafters! So you've got a knack for woodworking and a passion for creating beautiful, functional pieces. You've probably already crafted some stunning key holders that your friends and family adore. Now, you're ready to take your craft to the next level and sell your creations to a wider audience. But where do you begin? How do you turn your woodworking passion into a successful business?

    Don't worry, we're here to guide you through the exciting journey of selling handmade wooden key holders. We'll cover everything from crafting the perfect pieces to finding your ideal market and building a brand that resonates with your customers. So grab your favorite woodworking tools, get comfy, and let's dive in!

    Crafting Key Holders that Stand Out: Your Wooden Masterpieces

    Before you can start selling, you need to create key holders that truly wow your customers. Here are some tips to help you craft pieces that are both beautiful and functional:

    Embrace Unique Designs

    In a crowded marketplace, you need to stand out. Think outside the box with your designs. You can incorporate different wood species for a visually interesting contrast, experiment with unique shapes and sizes, or add decorative elements like metal accents, leather straps, or engraved details.

    Quality is King

    Invest in high-quality wood and finishes to ensure your key holders are durable and long-lasting. Carefully select wood species that are known for their durability and beauty, such as oak, walnut, maple, or cherry. Consider using a clear protective finish that enhances the wood's natural grain while providing a layer of protection.

    Consider Functionality

    Don't forget the practical side of your key holders. Design them with ample space for keys and other small items. You can add hooks for holding dog leashes, small pockets for storing cards or spare change, or even a built-in charging station for mobile devices.

    Embrace Personalization

    Offering personalized key holders can be a great way to add a touch of uniqueness and appeal to a wider audience. You can engrave names, initials, or special messages onto the wood. You can even offer custom designs based on customer preferences, such as incorporating family crests, company logos, or special symbols.

    Finding Your Niche: Who are Your Ideal Customers?

    Not everyone is looking for a handcrafted wooden key holder. So, who are you trying to reach with your creations? By defining your target audience, you can tailor your marketing and sales strategies to resonate with the right people.

    Home Decor Enthusiasts

    These customers appreciate the beauty and craftsmanship of handmade items. They're drawn to unique and stylish pieces that complement their home decor. For this audience, focus on showcasing the beauty of the wood grain, offering a range of stylish finishes, and highlighting the artistic aspects of your key holders.

    Practical Minimalists

    These individuals value functional and minimalist designs. They appreciate clean lines, simple shapes, and a focus on quality materials. For them, highlight the durability and functionality of your key holders, emphasizing the use of high-quality wood and sturdy construction.

    Gifting Seekers

    Many people are looking for thoughtful and unique gifts. Your handcrafted key holders can be a perfect choice for housewarming parties, birthdays, or special occasions. Highlight the personal touch and sentimental value of your creations. Offer gift wrapping options and personalized engravings to make your key holders even more special.

    Building Your Brand: Creating a Consistent Presence

    Once you've crafted some incredible key holders and identified your ideal customers, it's time to build your brand. Your brand is your unique identity, representing your values, style, and what makes your work stand out. Here's how to build a brand that resonates with your customers:

    Choose a Brand Name

    Your brand name should be memorable, easy to pronounce, and reflect your unique style. Consider using words related to wood, craftsmanship, or the feeling you want your brand to evoke. For example, "The Woodworker's Nook" or "Handcrafted Home."

    Develop a Brand Identity

    This includes your brand logo, color palette, fonts, and overall visual style. Your brand identity should be consistent across all your marketing materials and online presence. A strong brand identity helps build recognition and trust with your customers.

    Craft a Compelling Story

    Why do you make wooden key holders? What inspires you? What makes your creations special? Share your story with your customers. It adds a personal touch and allows them to connect with you on a deeper level.

    Marketing Your Crafts: Getting Your Key Holders Seen

    Now that you have your beautiful key holders and a strong brand, it's time to get them in front of your target audience. There are numerous ways to market your handcrafted creations. Here are some effective options:

    Online Marketplaces

    Platforms like Etsy, Amazon Handmade, and Shopify allow you to reach a global audience. Create professional product listings with high-quality photos and detailed descriptions. Engage with customers, respond to inquiries promptly, and provide excellent customer service.

    Social Media

    Instagram, Facebook, Pinterest, and TikTok are great for showcasing your work. Share behind-the-scenes glimpses of your creative process, post stunning photos of your finished key holders, run engaging contests, and collaborate with other artists.

    Local Craft Fairs and Markets

    Participating in craft fairs and markets allows you to connect with customers in person, showcase your work, and receive valuable feedback. Prepare a well-organized booth with eye-catching displays and informative signage.

    Collaborate with Other Businesses

    Partner with local shops, home decor stores, or interior designers to sell your key holders. This can expand your reach and introduce your work to new customers.

    Pricing Your Creations: Finding the Sweet Spot

    Setting the right price is crucial for your business success. You want to price your key holders competitively while still making a profit. Consider the following factors when determining your prices:

    Cost of Materials

    Calculate the cost of your wood, finishes, hardware, and any other materials needed to create your key holders.

    Labor Costs

    Don't underestimate the value of your time and skill. Factor in the time spent designing, crafting, and finishing your pieces.

    Market Research

    Research what similar handcrafted key holders are selling for online and in local markets. This will give you an idea of the current price range.

    Profit Margin

    Aim for a healthy profit margin that allows you to cover your costs, reinvest in your business, and earn a reasonable income.

    The Key to Success: Consistency and Passion

    Selling handmade wooden key holders is a journey, not a sprint. It takes dedication, hard work, and a genuine passion for your craft. Here are some final thoughts to keep in mind as you embark on this exciting adventure:

  • Be consistent: Continuously create new designs, keep your online presence active, and engage with your customers regularly.
  • Embrace feedback: Listen to customer feedback, and use it to improve your designs, your business practices, and your overall customer experience.
  • Never stop learning: Stay up-to-date with industry trends, explore new woodworking techniques, and constantly challenge yourself to create even more stunning pieces.
  • Enjoy the process: Remember why you started crafting in the first place. Let your passion for woodworking shine through in your creations.
  • By following these tips, you can build a successful business selling your handmade wooden key holders. You'll create beautiful, functional pieces that bring joy to your customers and make a living doing what you love. So, grab your tools, unleash your creativity, and get ready to craft your way to success!

    Share:

    Popular Posts

    Powered by Blogger.

    Pages